SmartSign
Send PDF documents for electronic signature from any monday.com item. Signers receive a secure emailed link, verify their identity, and sign. Completed documents are returned directly to your board.
1. Install SmartSign
SmartSign operates as an item view. It is accessed from an individual item as each signing request relates to a single record. Installation is performed once per board, after which the view is available on every item of that board.
Open Any Item on Your Board
Select an item name to open it. The item panel displays its own tab row along the top, including Updates and Files.
Add a New View
Select the + at the end of the tab row to open the monday.com view picker.
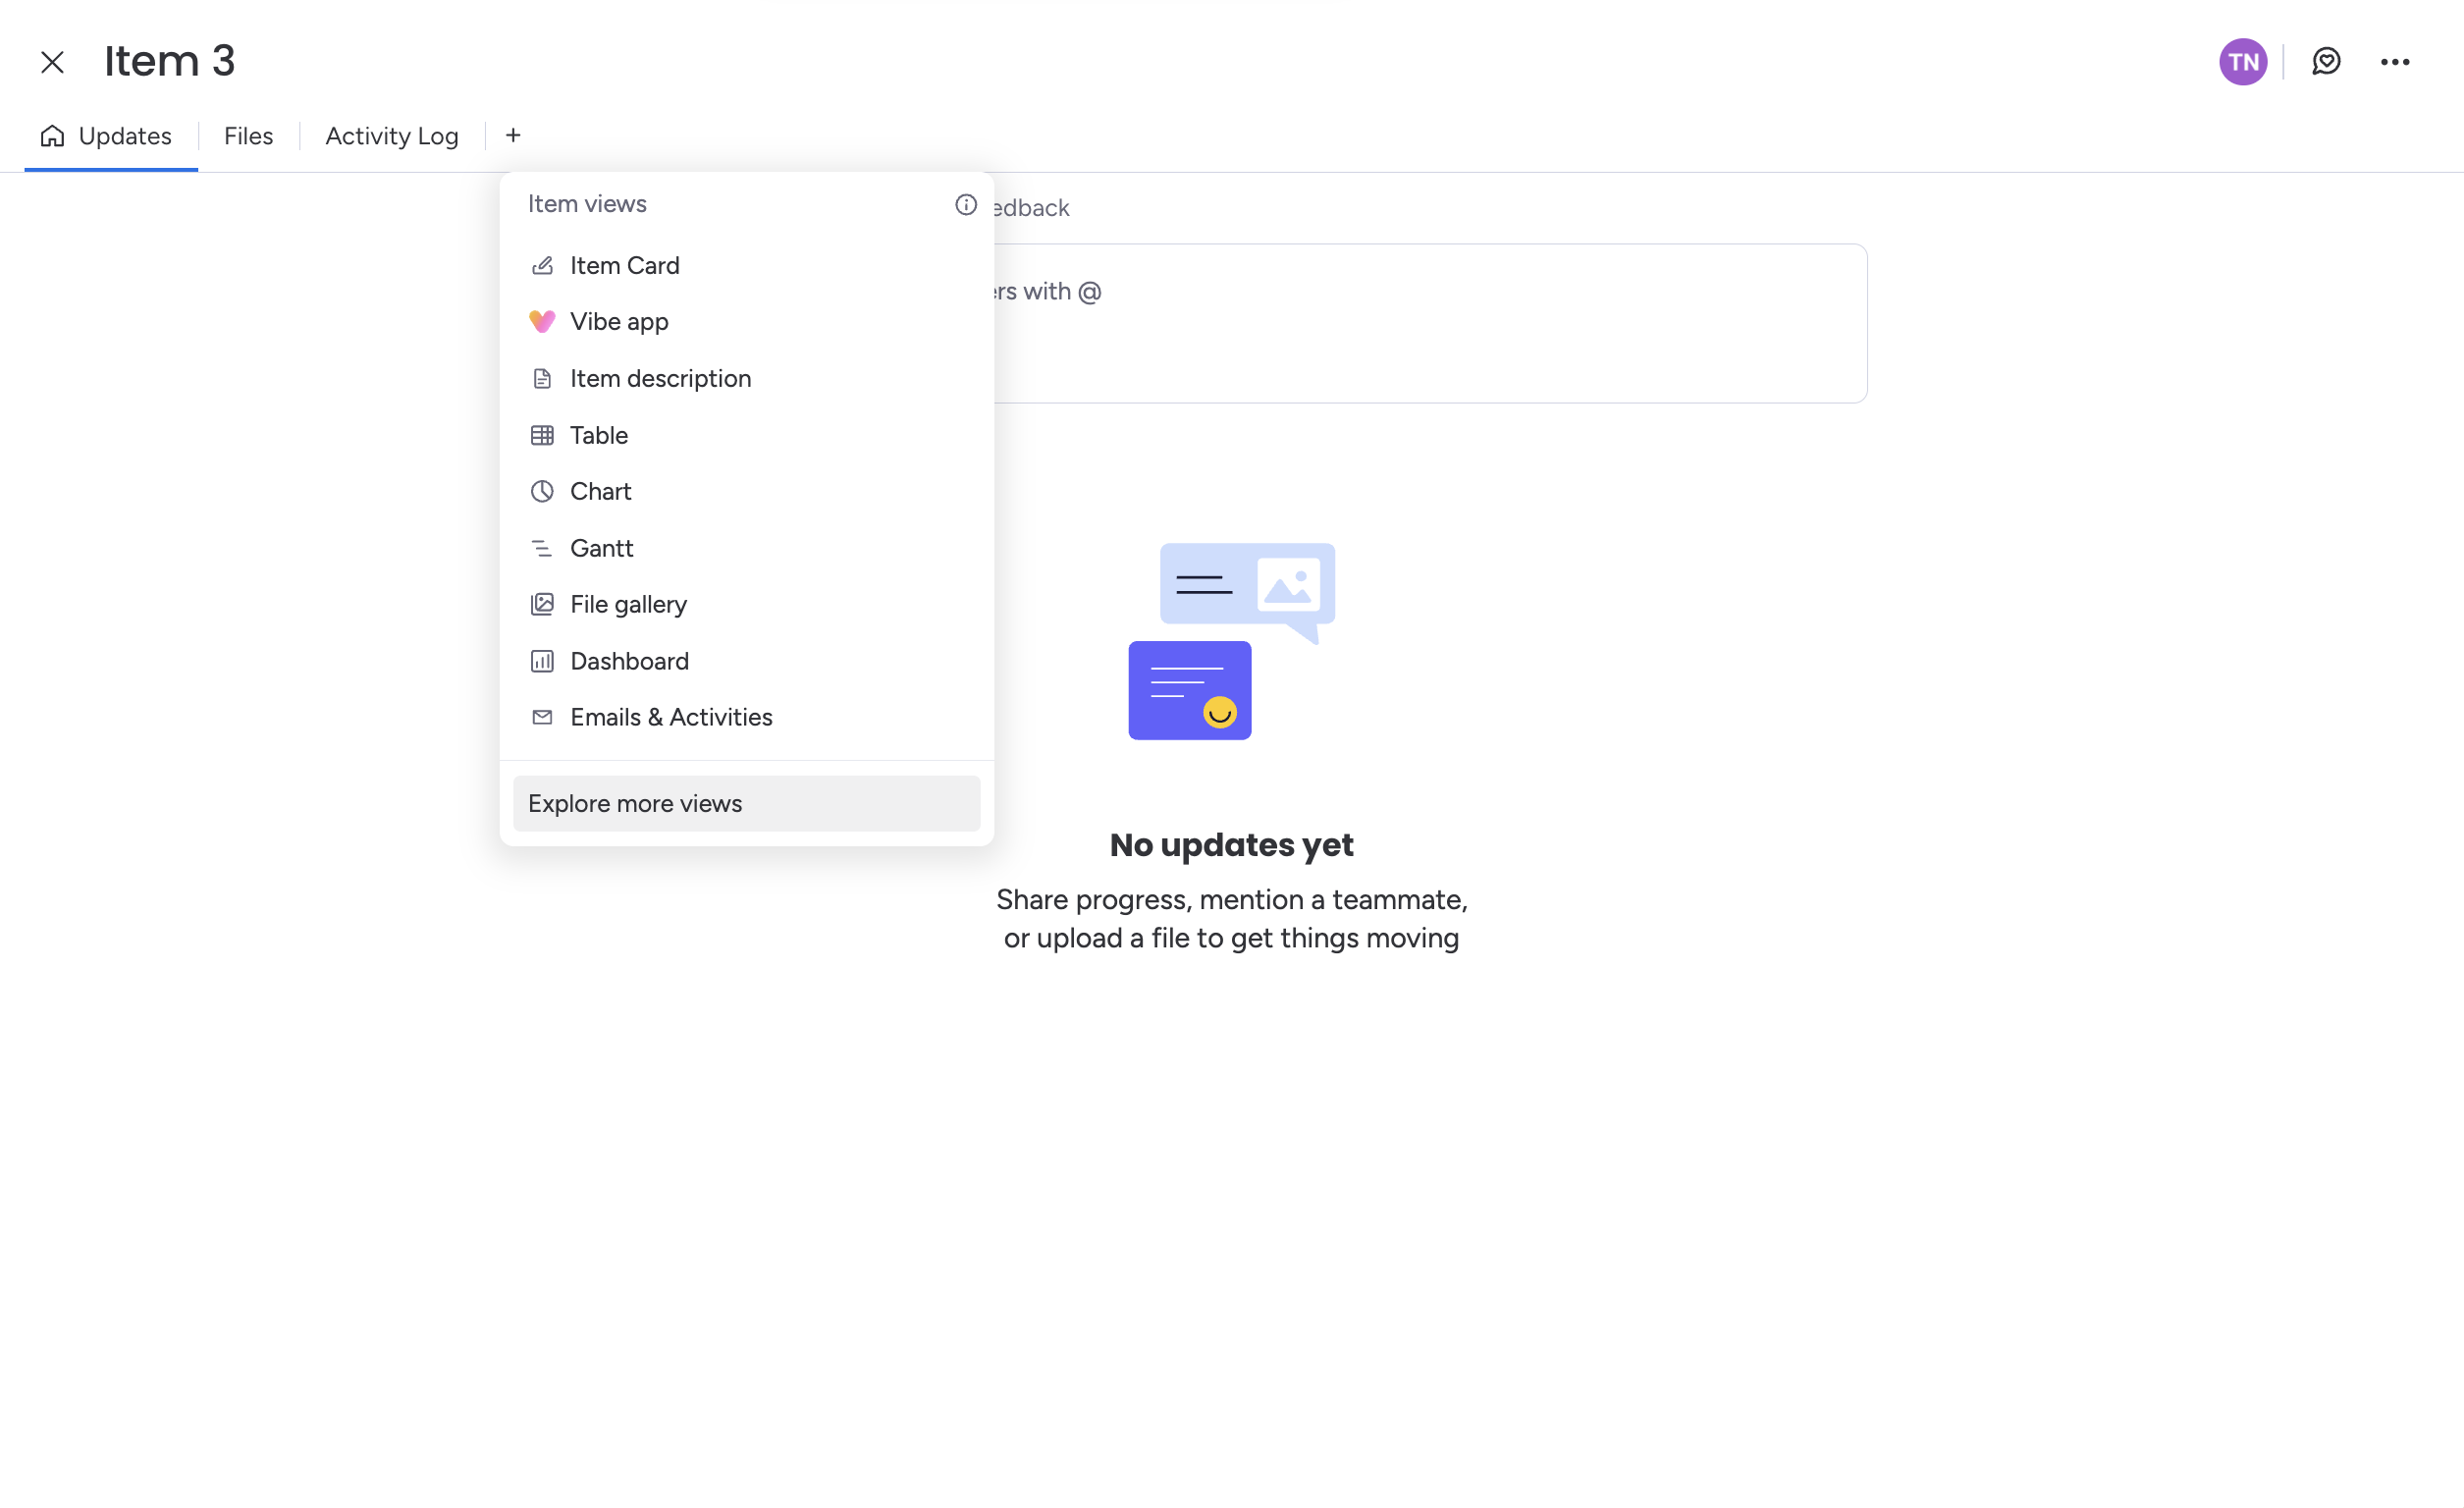
Search for SmartSign
Search for SmartSign and select it. If the application has not yet been installed on your account, follow the link to the monday.com marketplace, complete the installation, and return to this step.
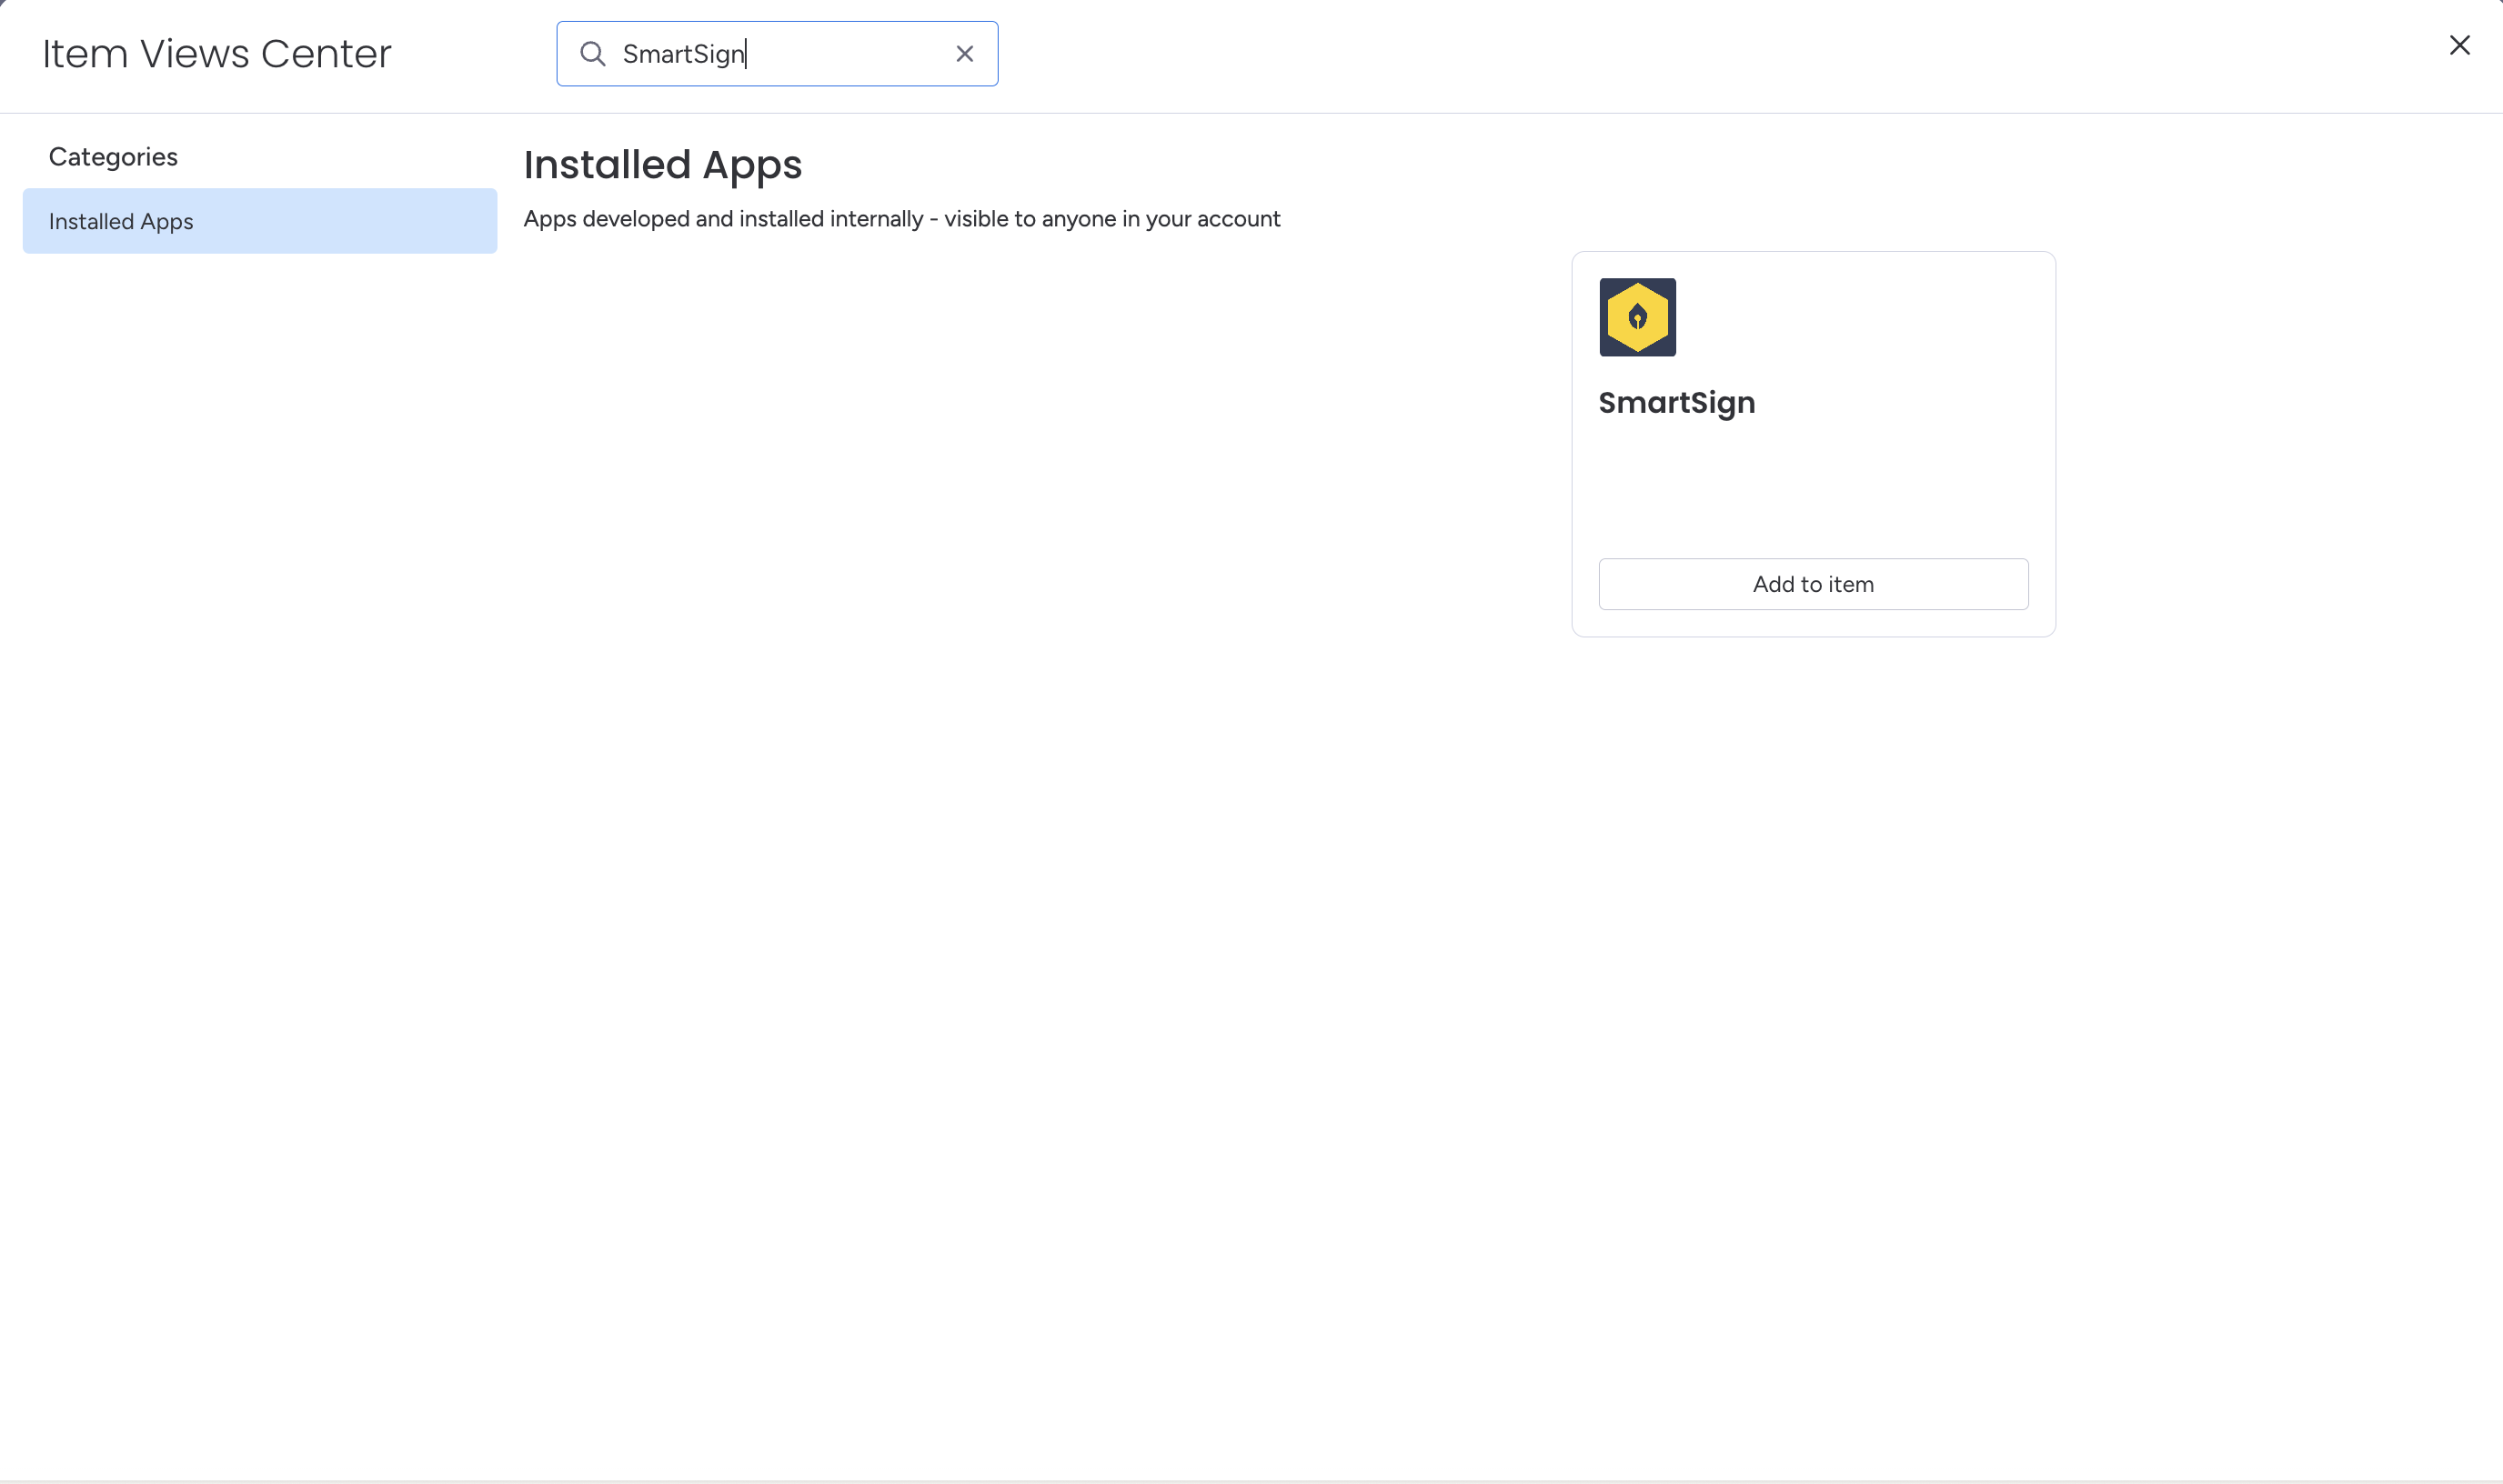
Open the SmartSign Tab
SmartSign is added as a tab on the item and opens on New request. The tab is now present on every item of this board; installation does not need to be repeated.
2. Configure the Board
One setting is required before any request can be sent: the destination for completed documents. It is configured on the Settings tab and applies to every request issued from this board.
Open Settings
In SmartSign, select Settings at the right of the tab row.
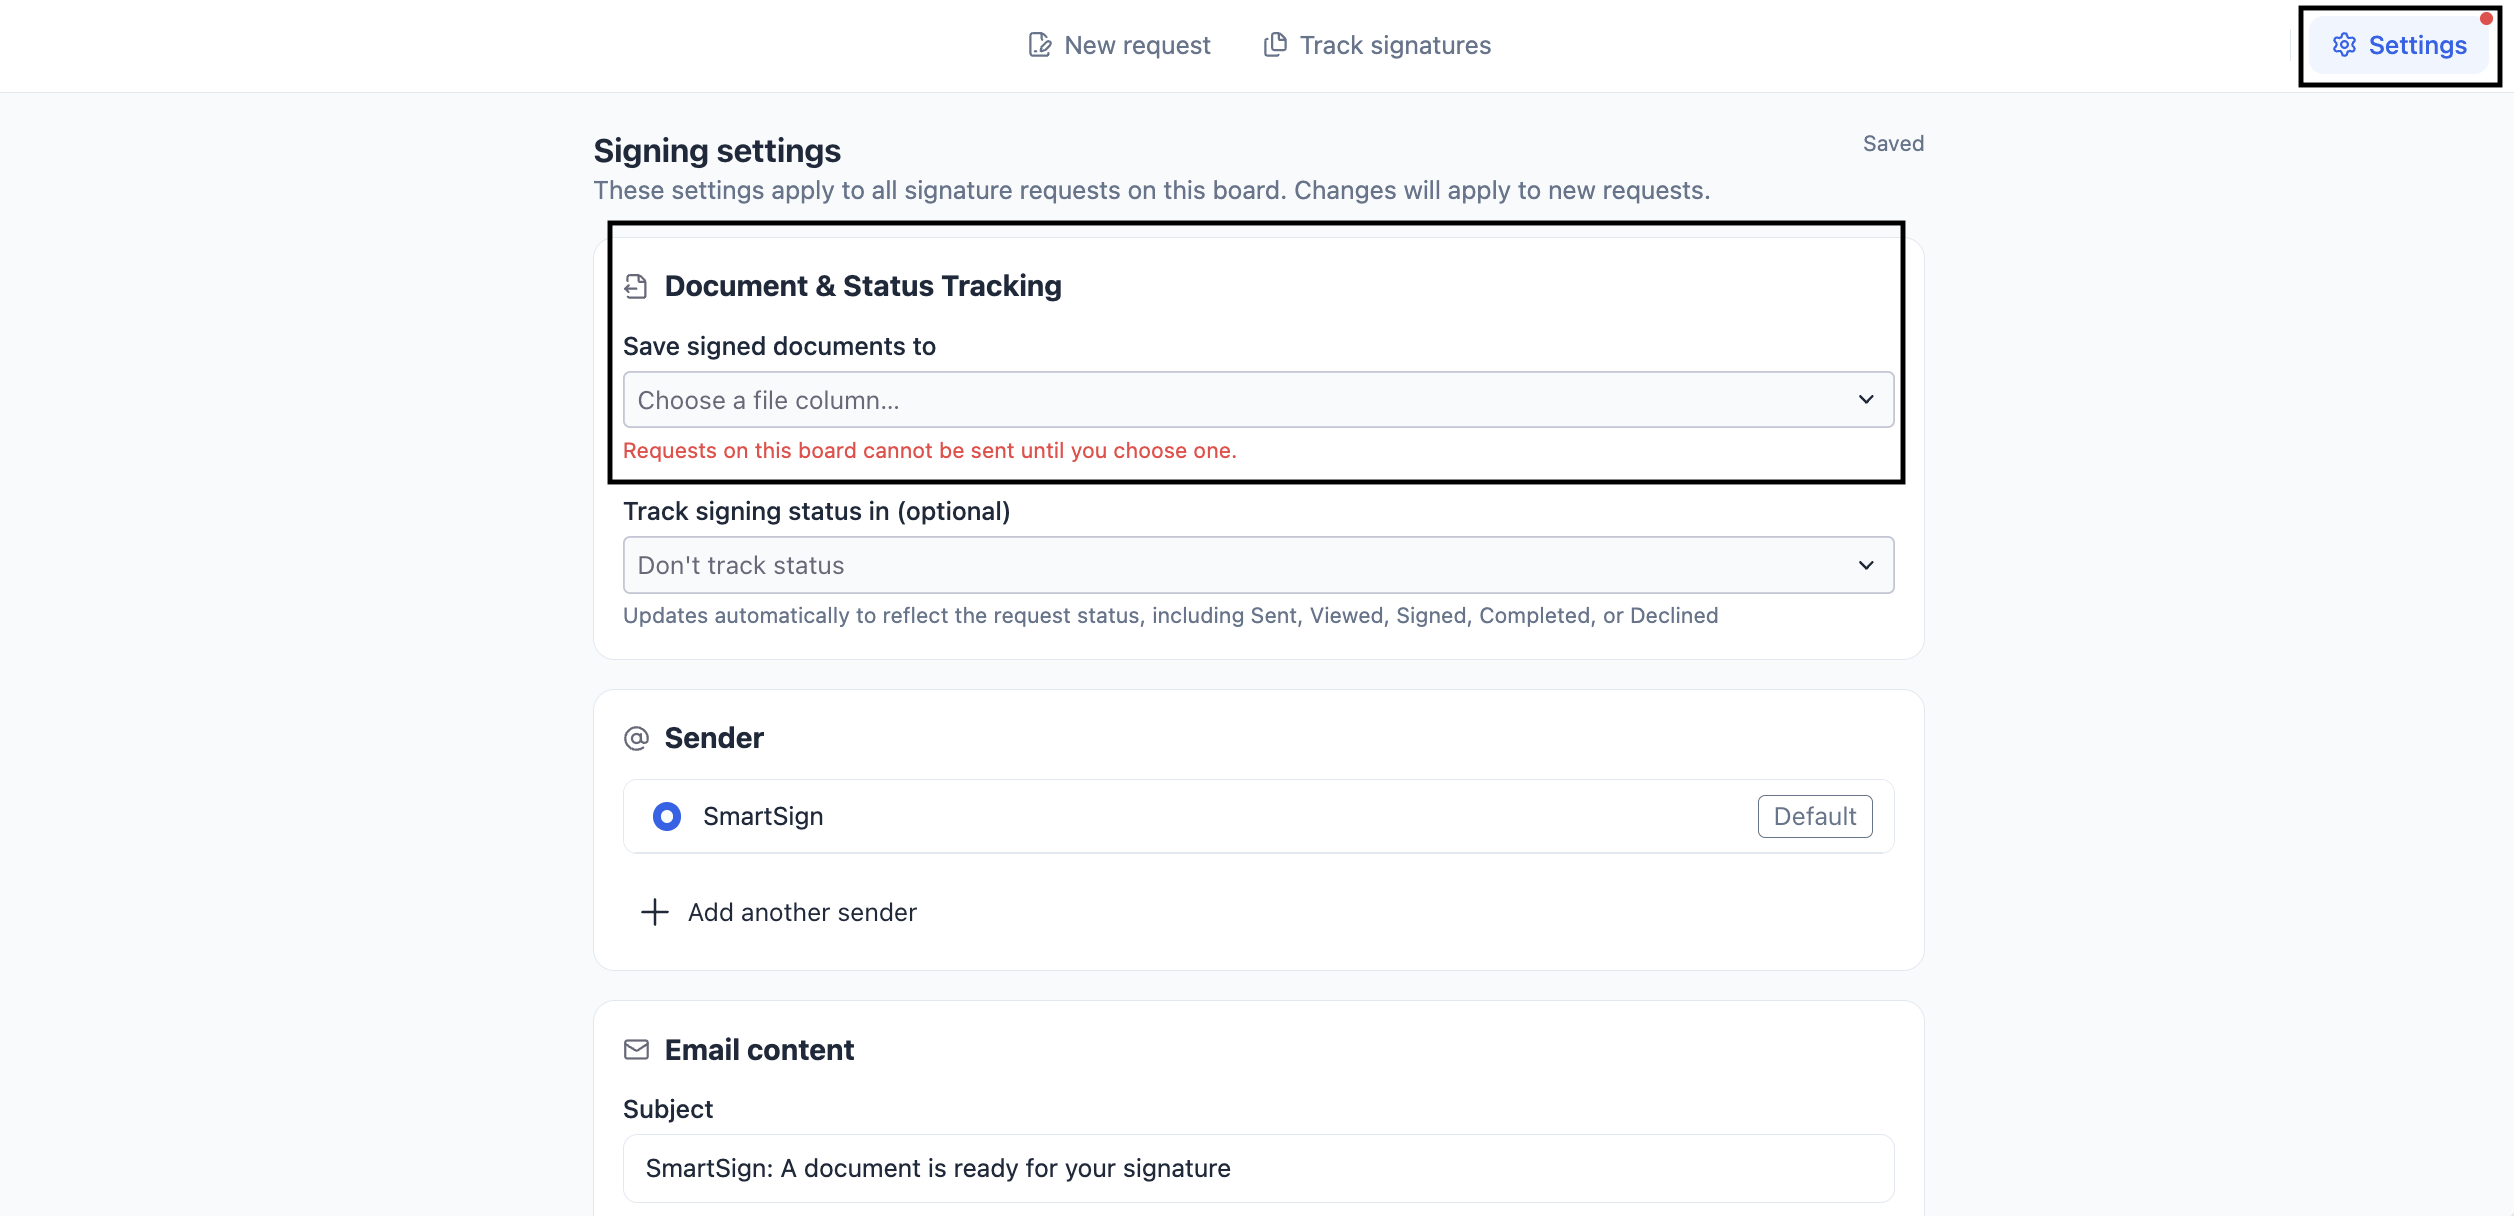
Select a Destination for Signed Documents
Under Document & Status Tracking, set Save signed documents to to a File column.
If no suitable column exists, select + Create new column… from the dropdown and SmartSign will create one.
Configure Status Tracking (Optional)
Set Track signing status in to a Status column. SmartSign will then update the item through Sent → Viewed → Signed → Completed / Declined automatically, which is sufficient to drive board automations.
Sending is blocked until a File column is selected.
3. Send Your First Signature Request
This section covers the complete process, from adding a document to dispatching the request. Open an item and select SmartSign; the builder opens on step 1.
Add Your PDF
Drop a PDF onto the dropzone, or select the control to choose a file.
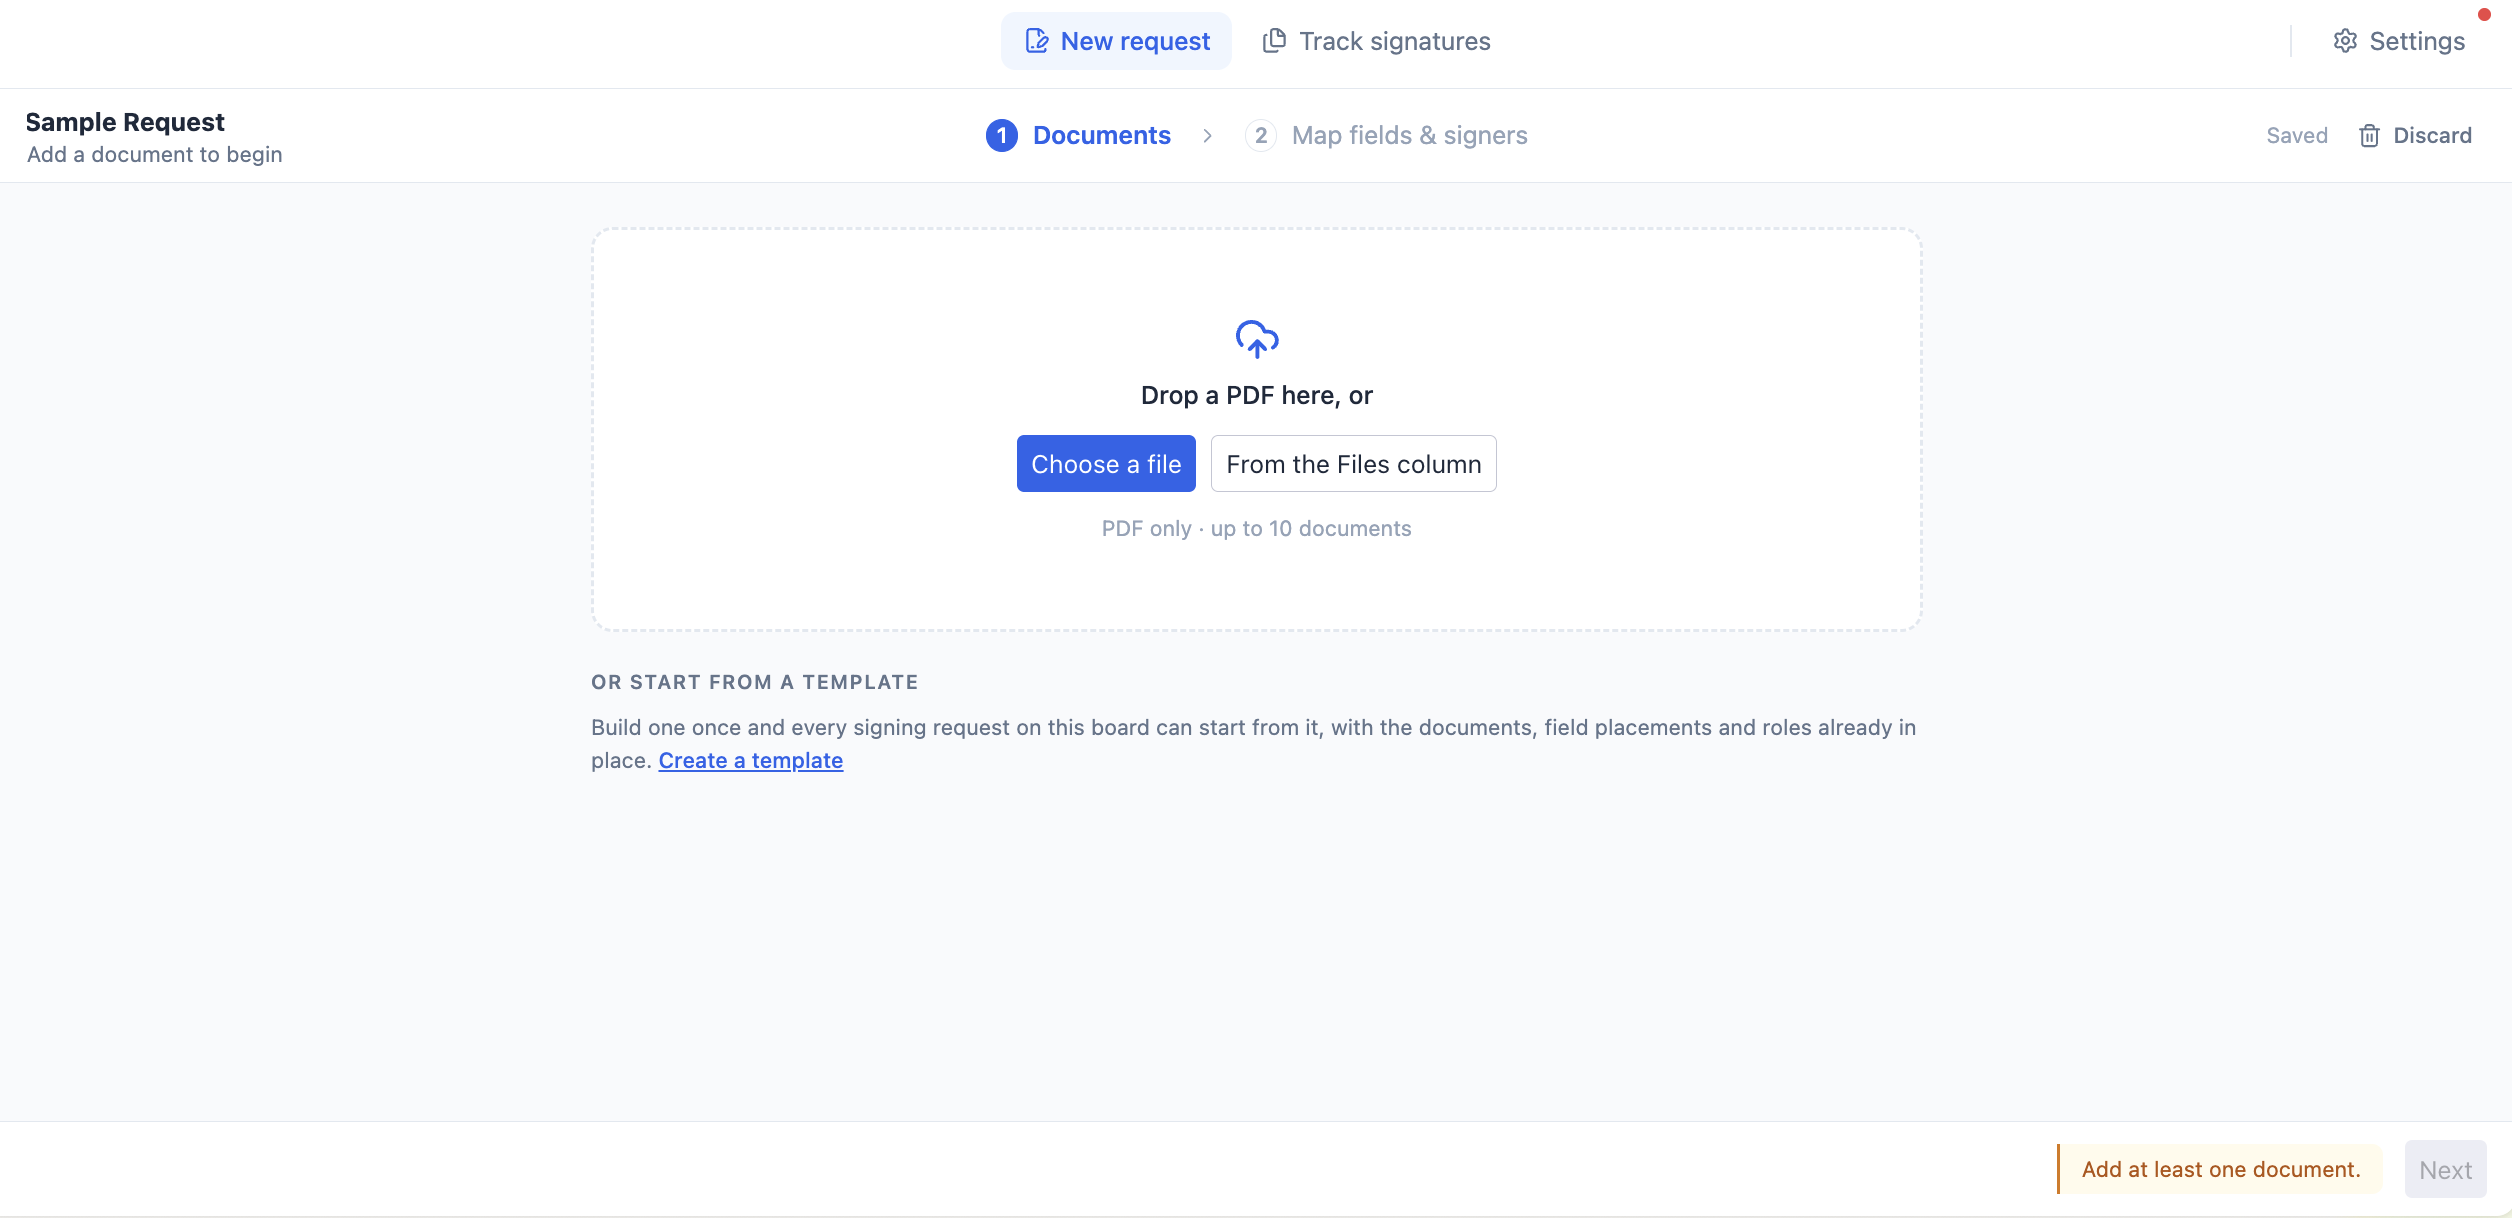
No draft is created until the first document is added. From this point all changes are saved automatically; the item can be closed and the draft resumed later.
Proceed to Step 2
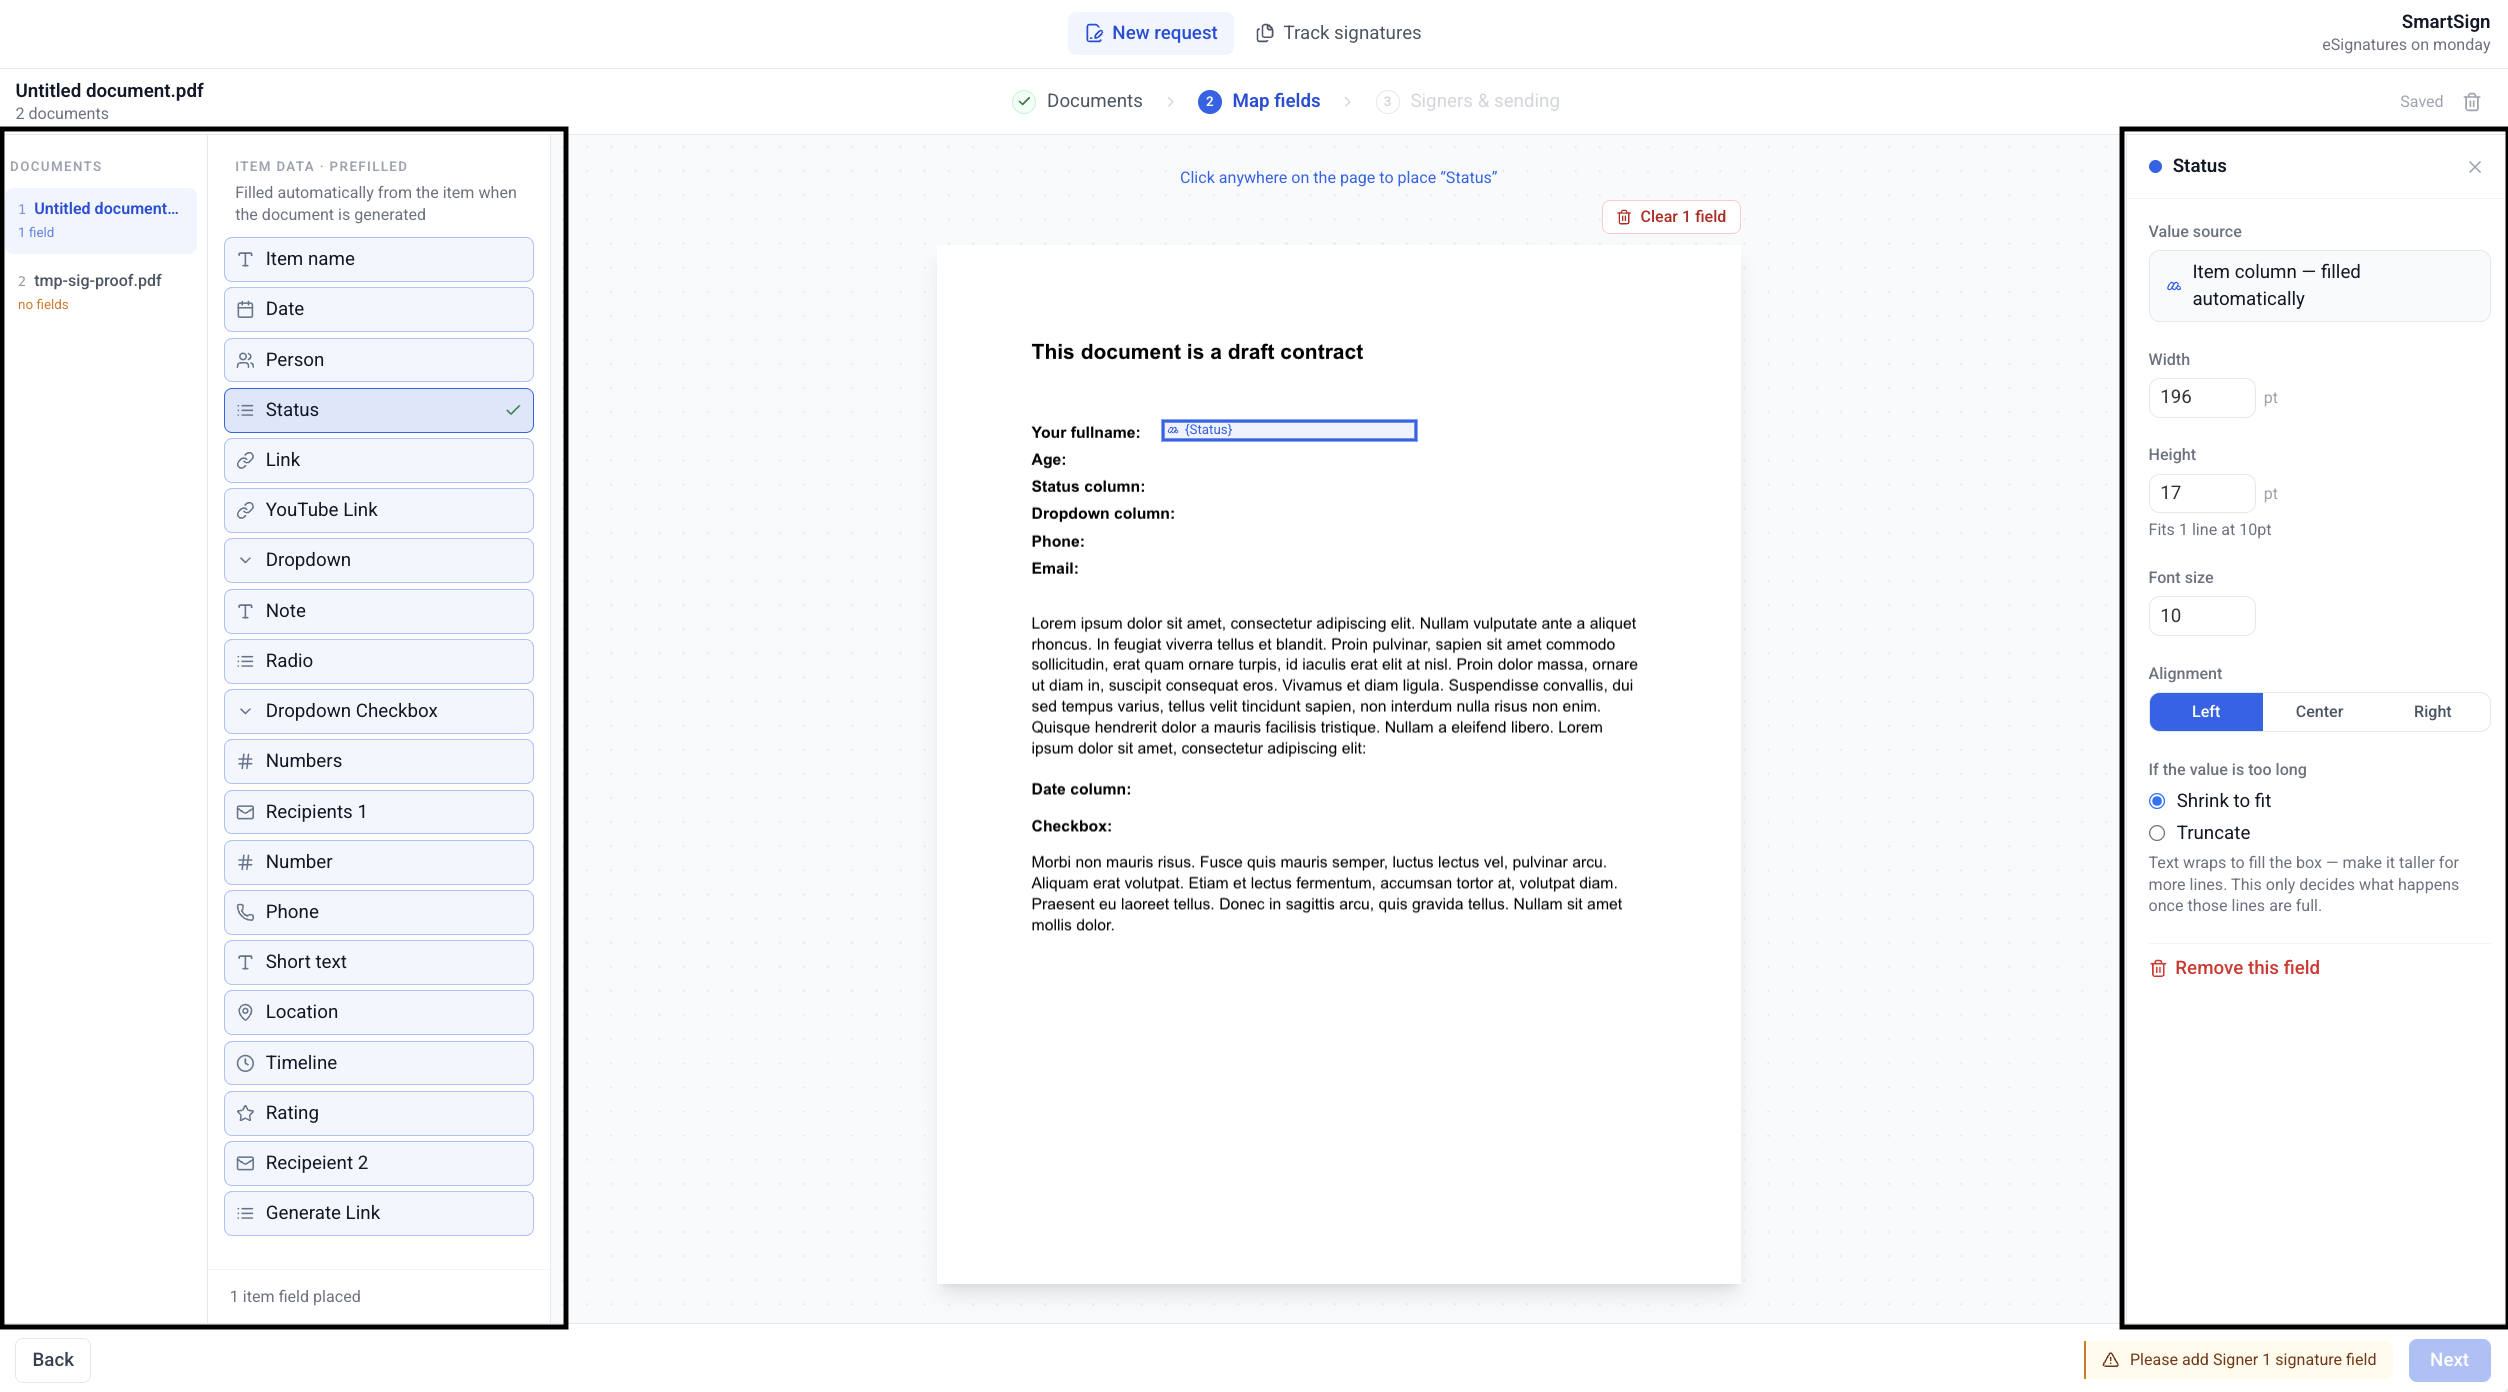
Select Next. The field mapper opens in four panes: the document list on the left, the field palette beside it, the page in the centre, and a properties panel on the right.
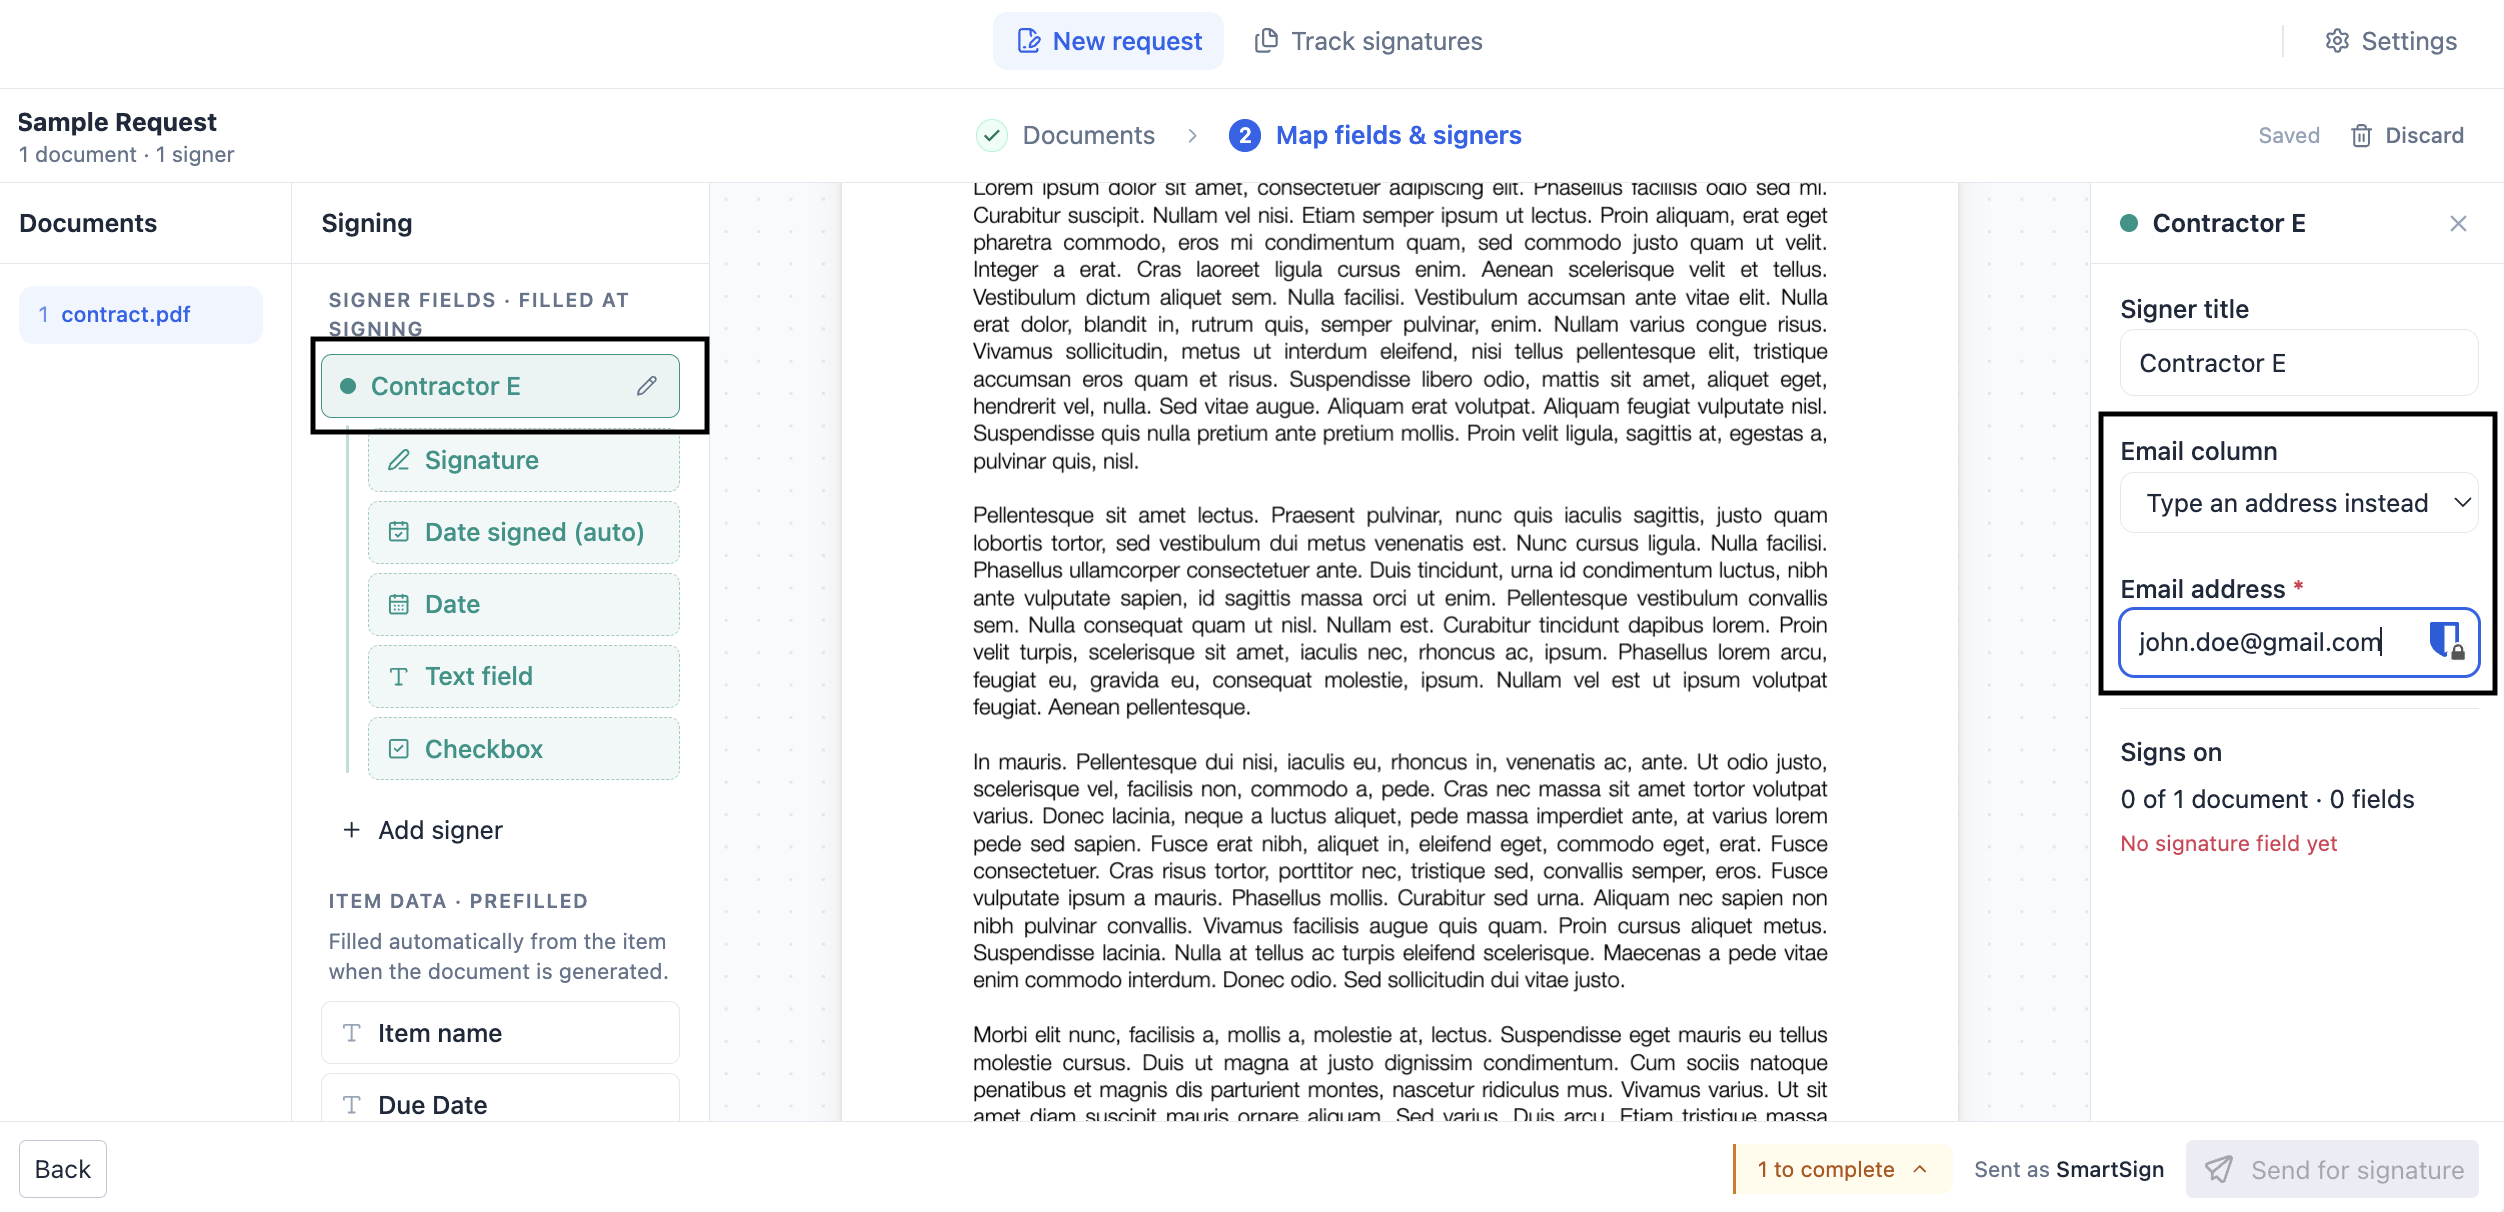
Name the Signer and Supply an Address
The signer roster is located at the top of the palette and contains one signer by default. Select their row to open their details on the right.
Enter a descriptive title — for example, Client or Contractor — then either select an Email column to read the address from this item, or select Type an address instead and enter one manually.
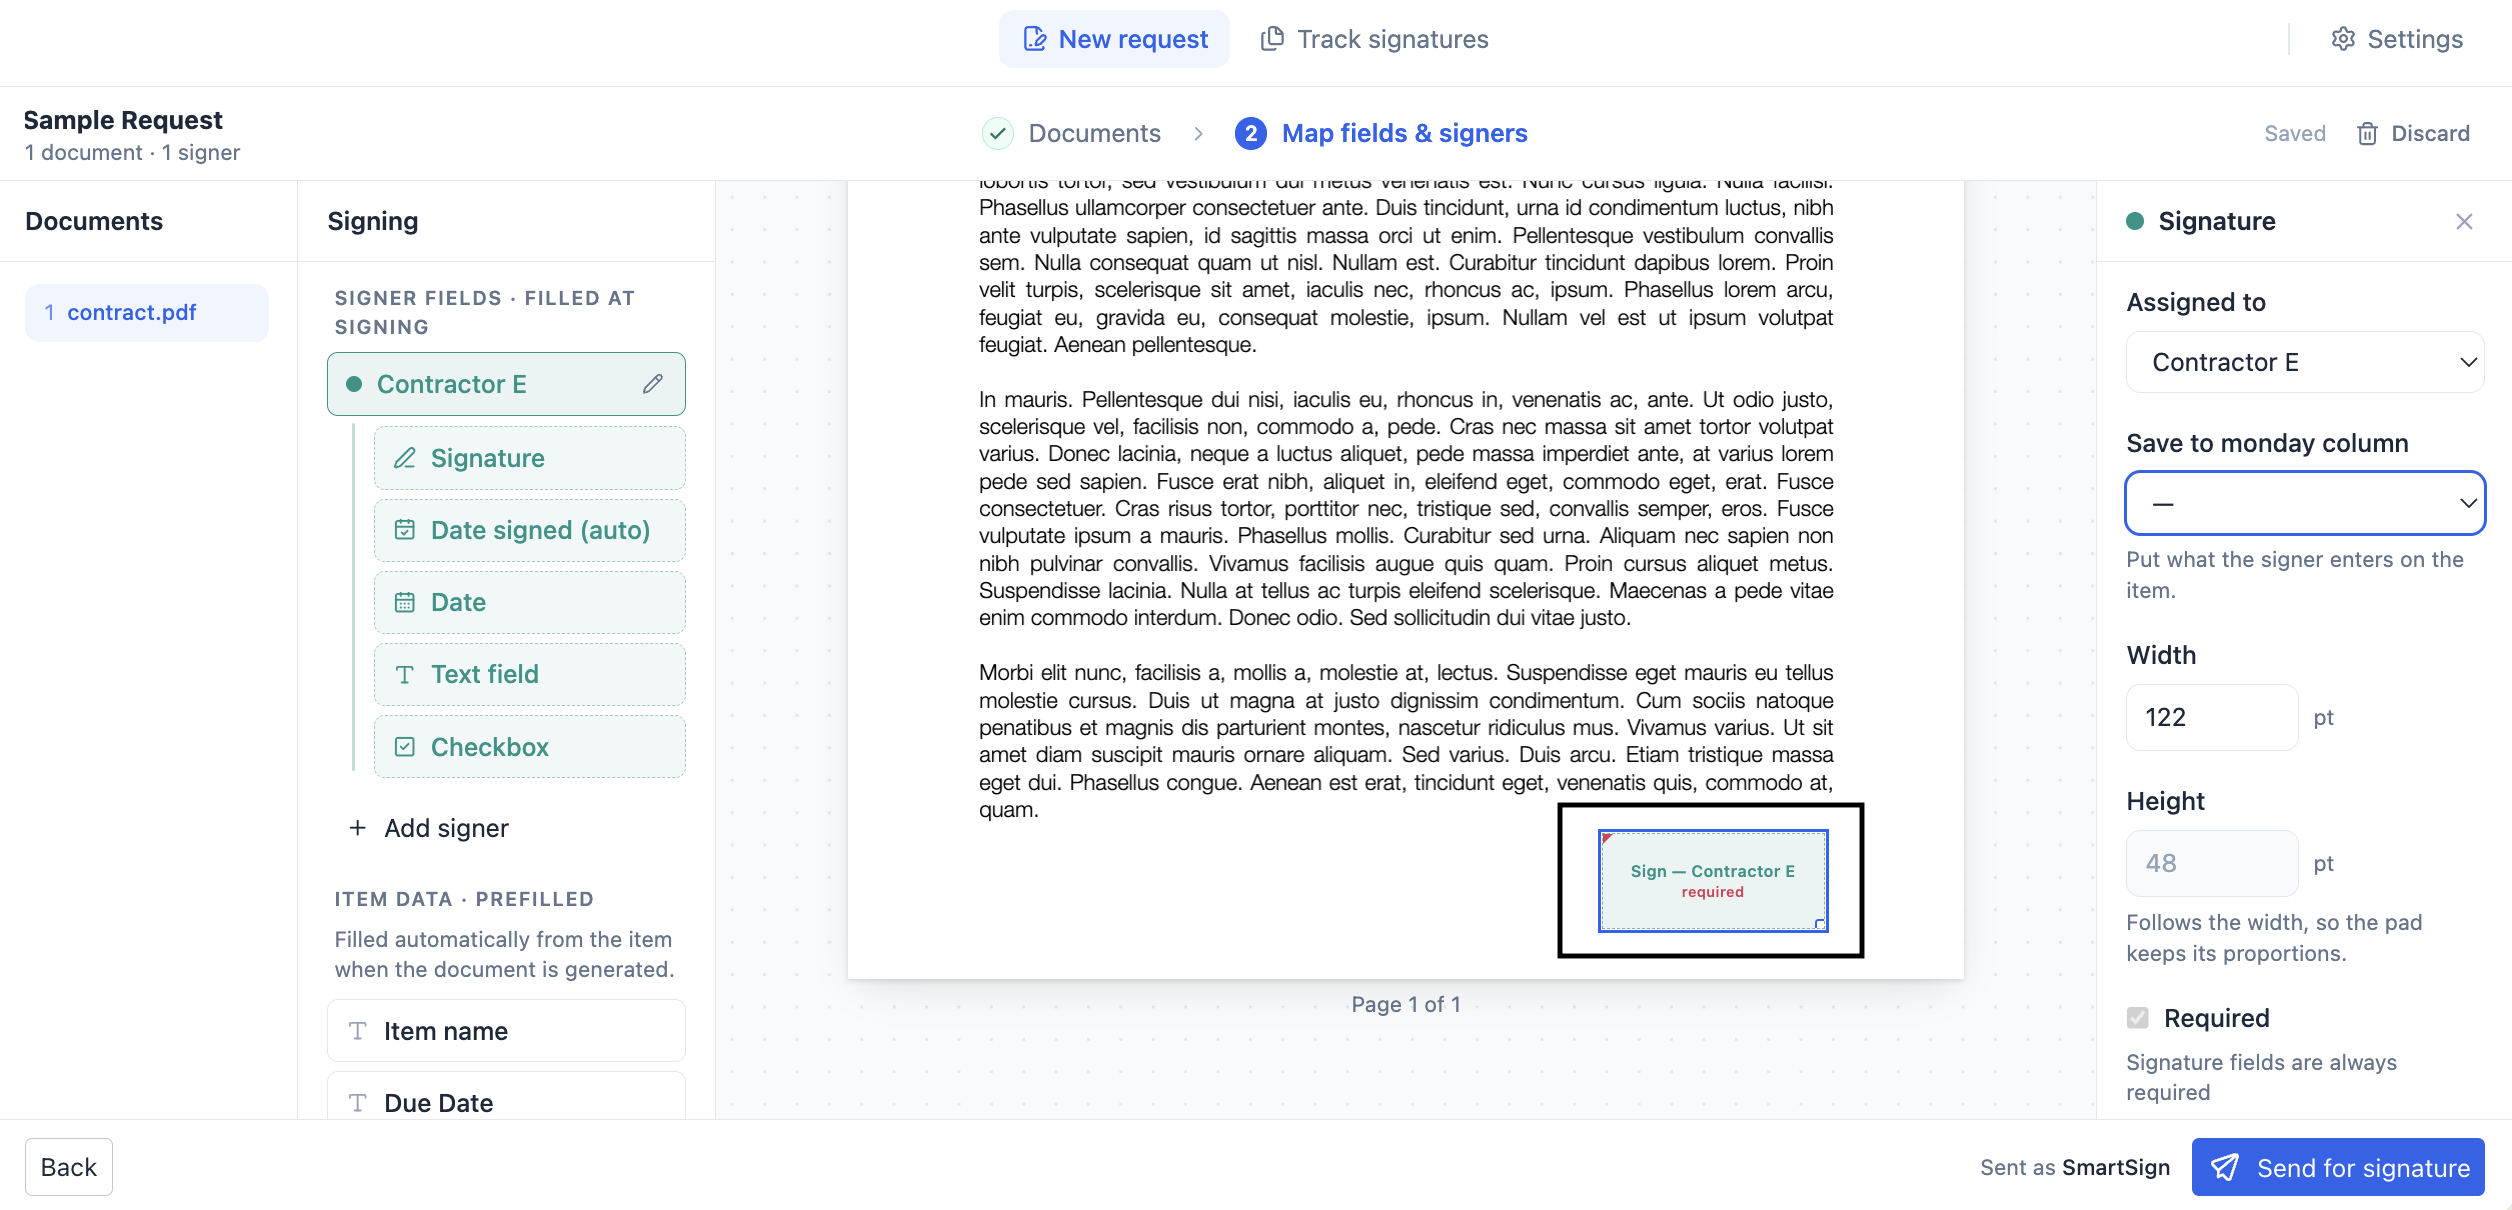
Place a Signature Field
With the signer’s row selected, drag Signature from the palette to the position on the page where they are required to sign. The field is placed in that signer’s colour. Drag the field to reposition it, or drag the corner handle to resize it.
Each signer requires at least one signature field within the request. This is a mandatory condition for sending.
Add Further Fields as Required
Place Date signed (auto) alongside the signature to have the date applied automatically on completion. Use the blue Item data · prefilled group to print values already held on the monday.com item, such as a client name, amount, or reference number.
Send the Request
Select Send for signature.
If the control is disabled, open the checklist beside it. Outstanding requirements are listed and grouped by signer.
SmartSign switches to Track signatures and the invitation is dispatched.
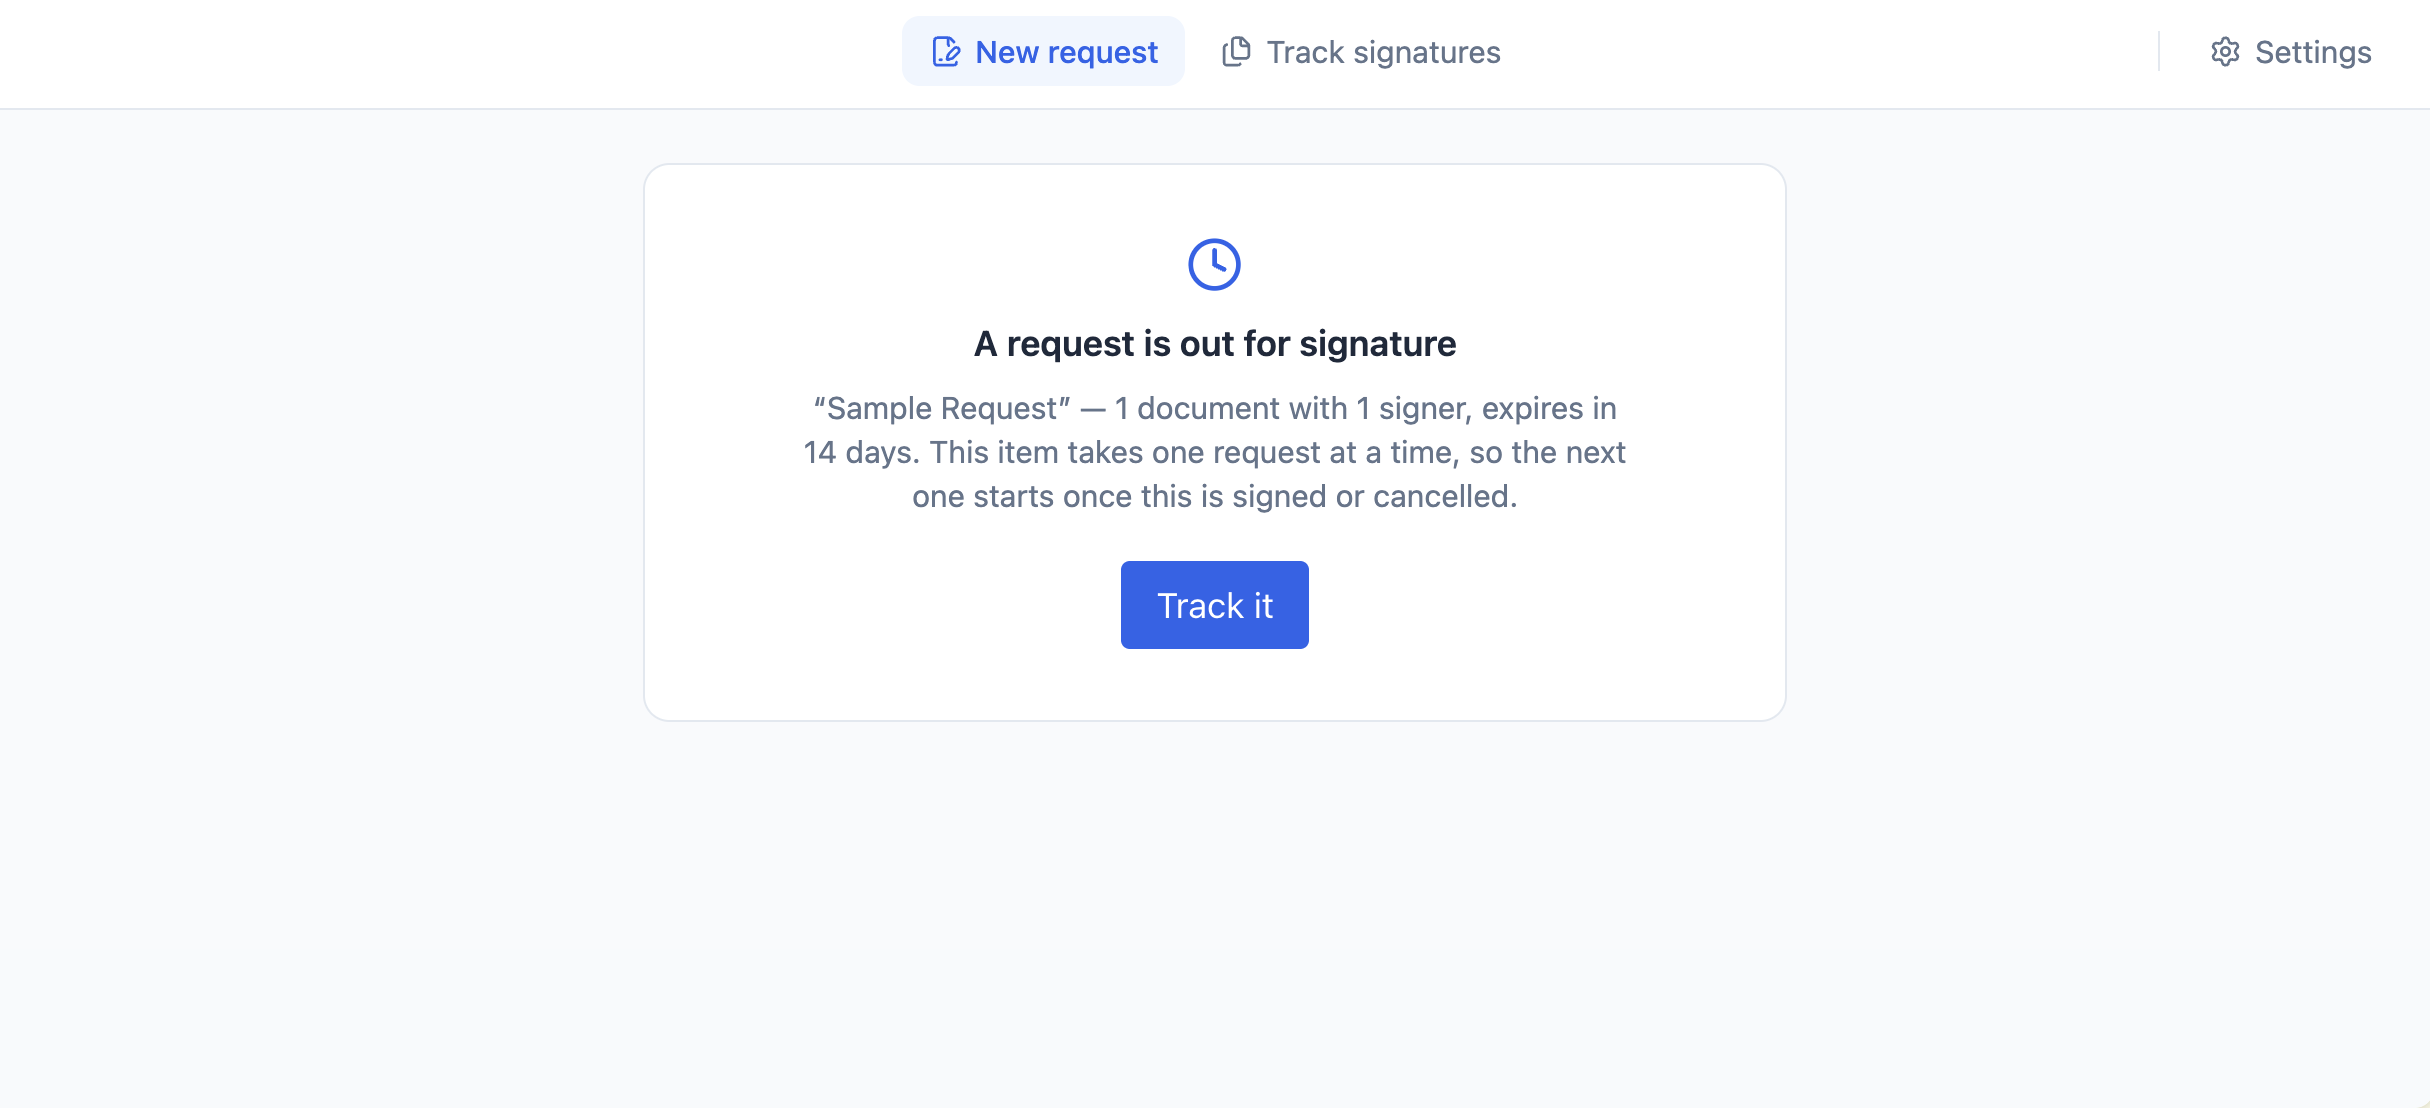
An item supports one active request at a time. Complete or cancel the existing request before starting another.
4. The Signer Experience
Signers do not require a monday.com account. The signing process takes place on a dedicated page and is supported on any device.
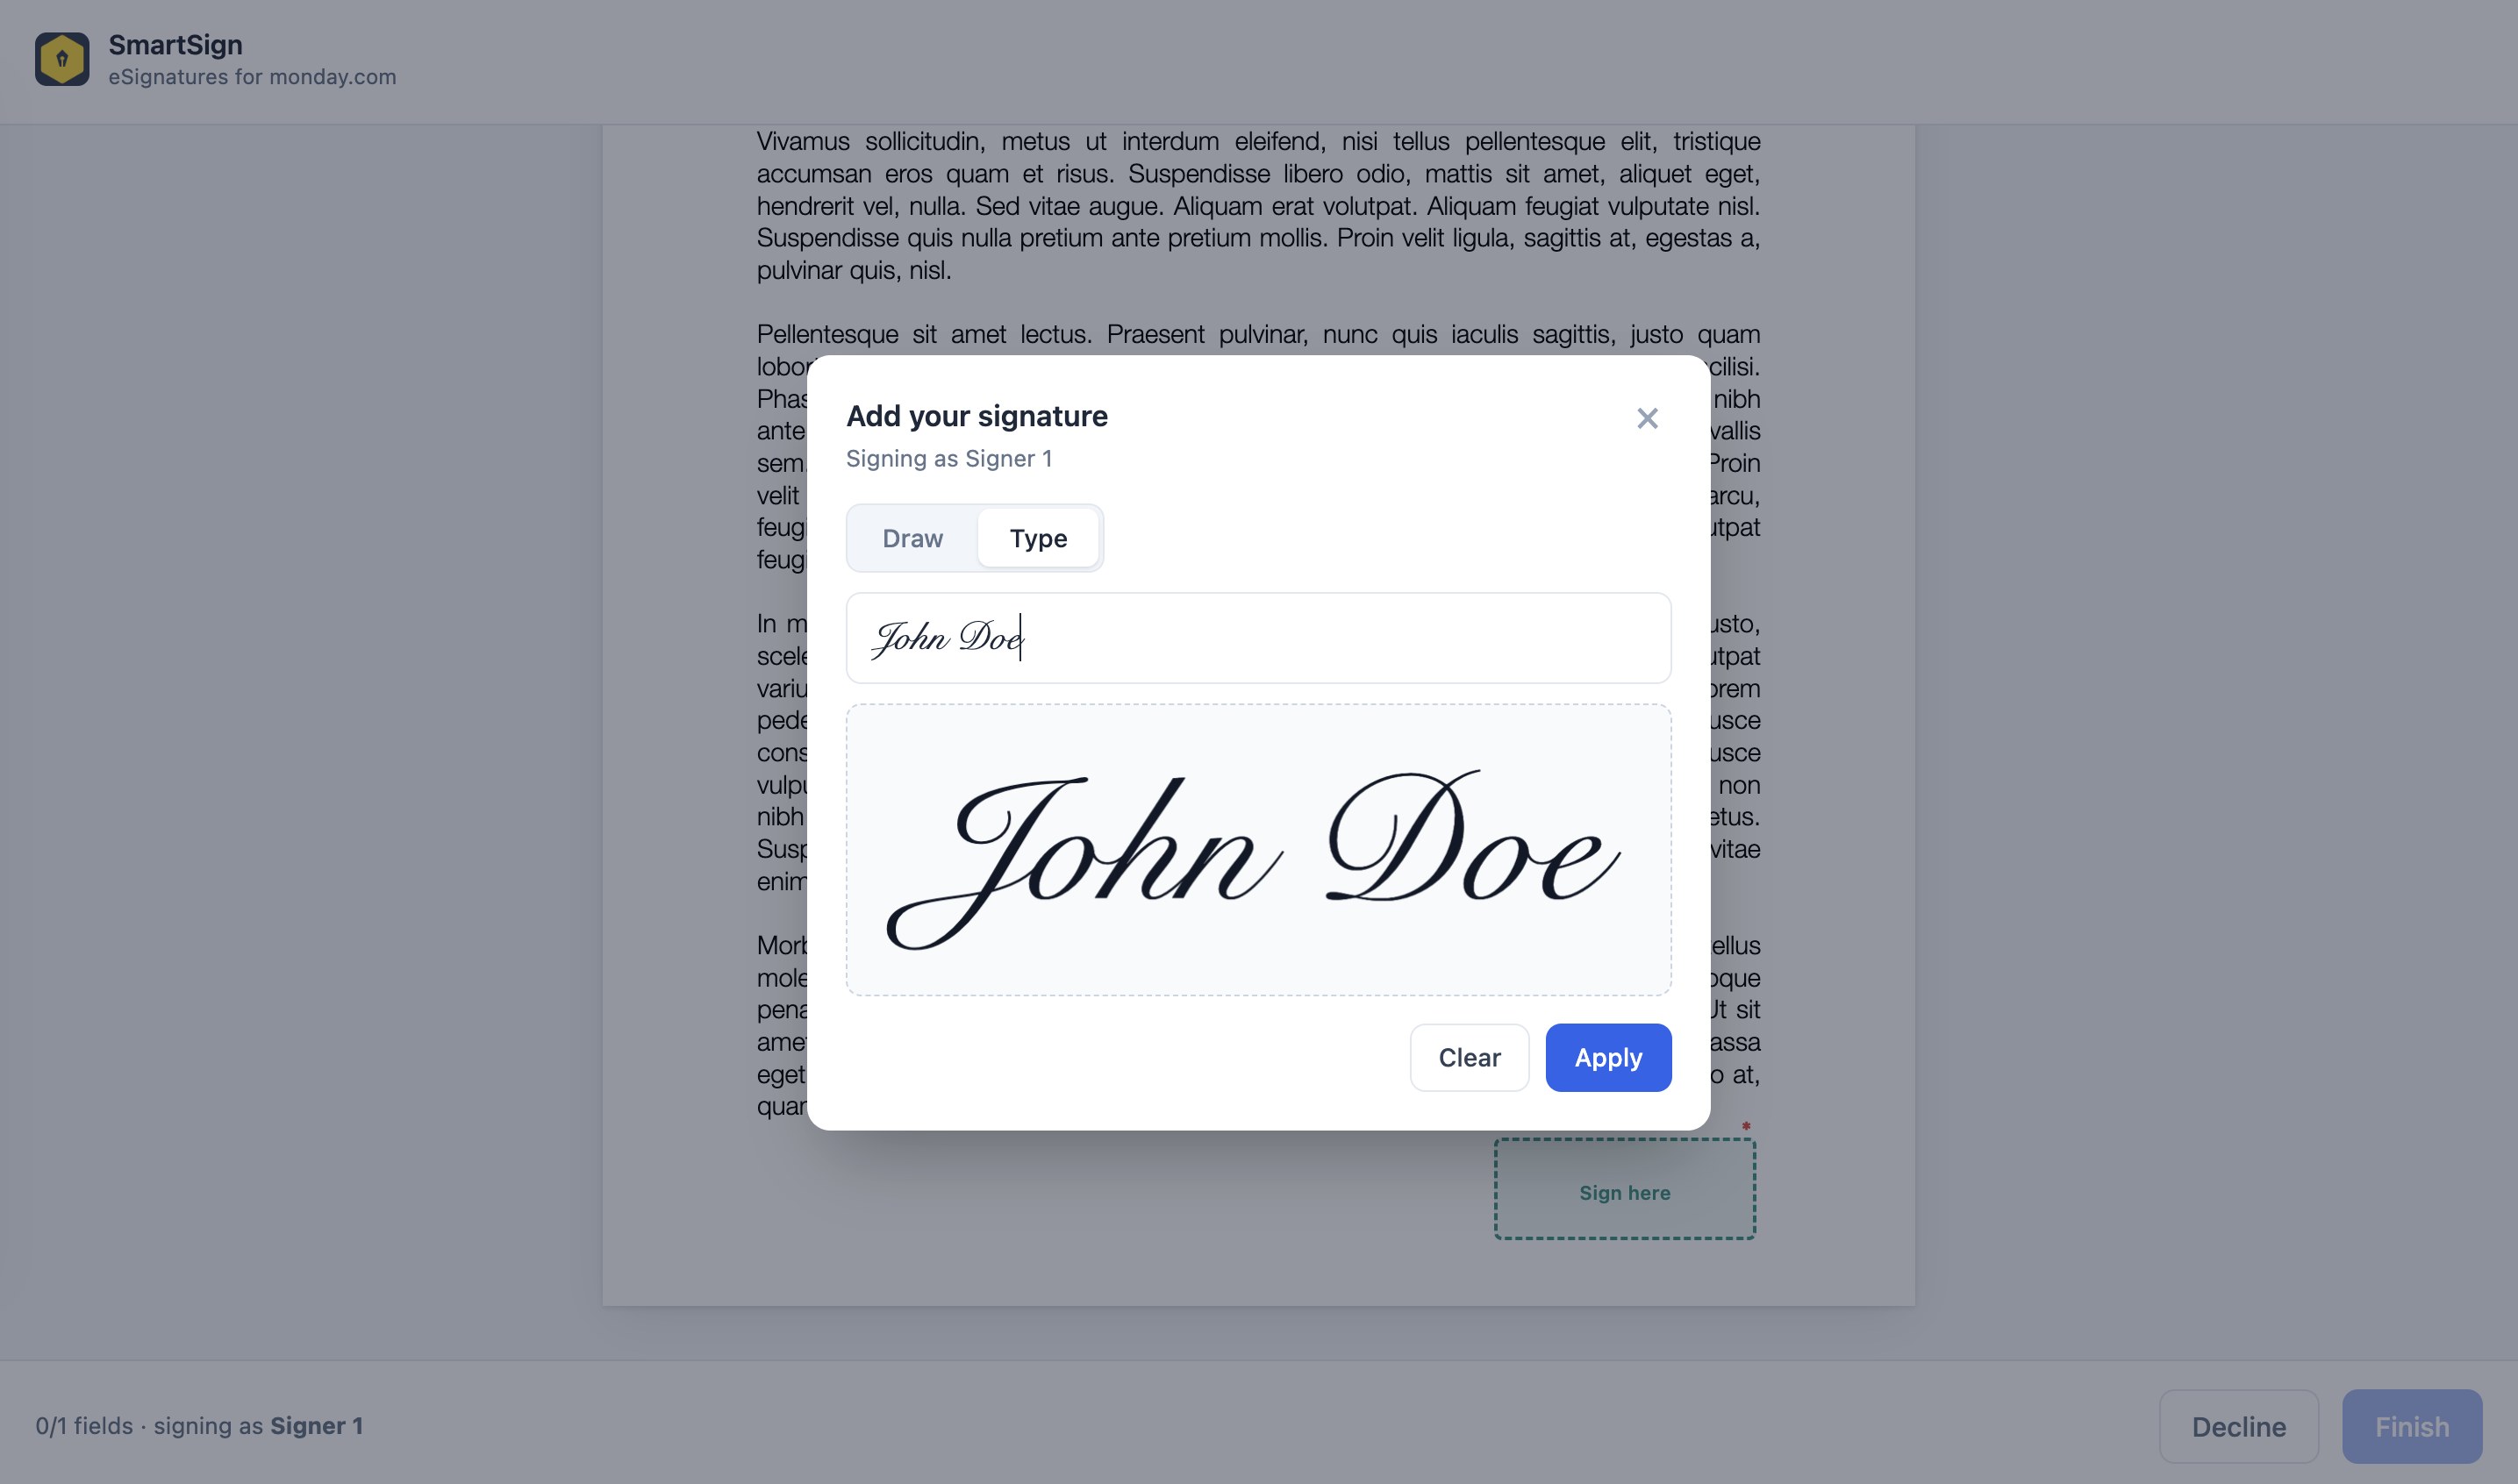
| Signers receive | Required action |
|---|---|
| An email containing a signing link | Select the link to open the document |
| A 6-digit code, sent separately | Enter the code to confirm ownership of the address. This step can be disabled in Settings |
| A consent notice | Confirm agreement to sign electronically |
| The document, with their fields indicated | Only their own fields are interactive. Fields belonging to other signers are visible but inactive |
| A signature pad | Draw a signature, or enter a name rendered in a script typeface |
| Next, then Finish | Each document is committed on completion, so the session can be interrupted without loss |
On mobile devices the document remains legible and each field is completed in a sheet at the base of the screen — one field at a time, presented in reading order and advanced by a single Next field control.
Signers may also decline, optionally providing a reason. A decline closes the request for all parties and is recorded, with the stated reason, on the tracking timeline.
With Sign in order enabled, each signer is invited only once the preceding signer has completed. Signers who open the link before their turn are informed that they will be notified when it is their turn. When disabled, all signers are invited simultaneously.
5. Track Signatures
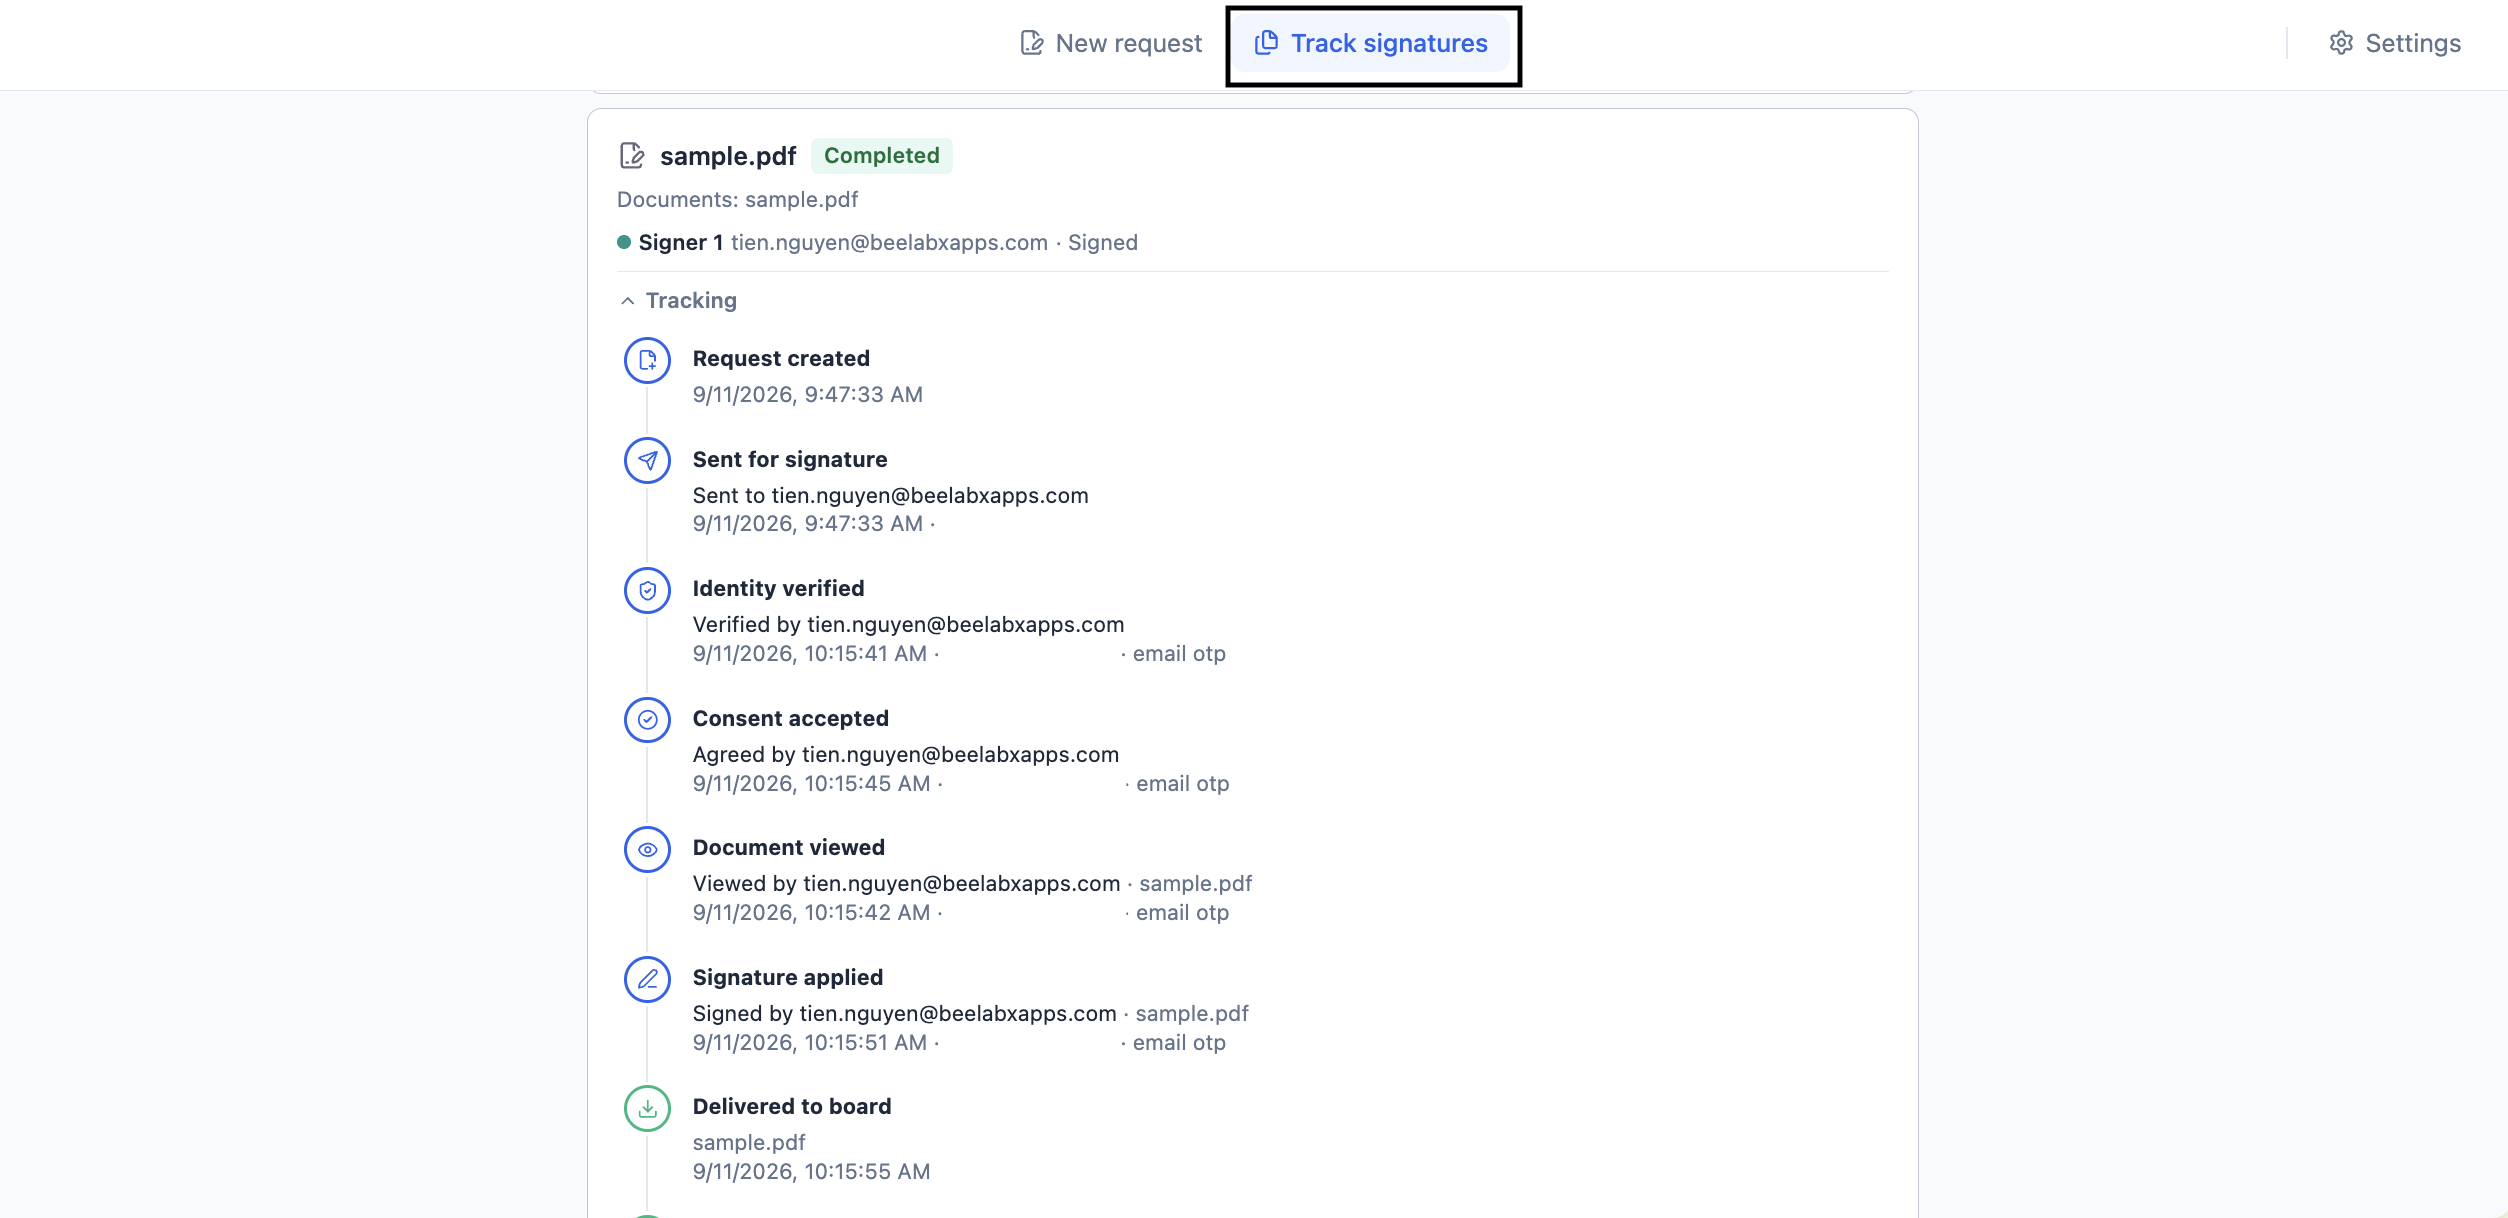
All requests sent from this item, most recent first.
Request Status
| Status | Meaning |
|---|---|
| Pending | In the process of being sent |
| Out for signature | Active; signers may sign. Displays expires in N days |
| Completed | All signers have signed |
| Declined | A signer declined; the request is closed |
| Expired | The link passed its expiry date |
| Cancelled | The request was withdrawn |
Cancelling a Request
Available for open requests only. The confirmation states the consequences: signing links cease to function immediately, and signers are not notified automatically.
The Tracking Timeline
Collapsed by default; select to load. The timeline presents the audit trail in readable form — the recipient of each invitation, views, signatures, timestamps, originating IP addresses, and the document each event relates to. A decline is recorded with its stated reason. The trail is append-only.
6. The Signed Documents
When the final signer completes, SmartSign generates the completed PDFs and delivers them.
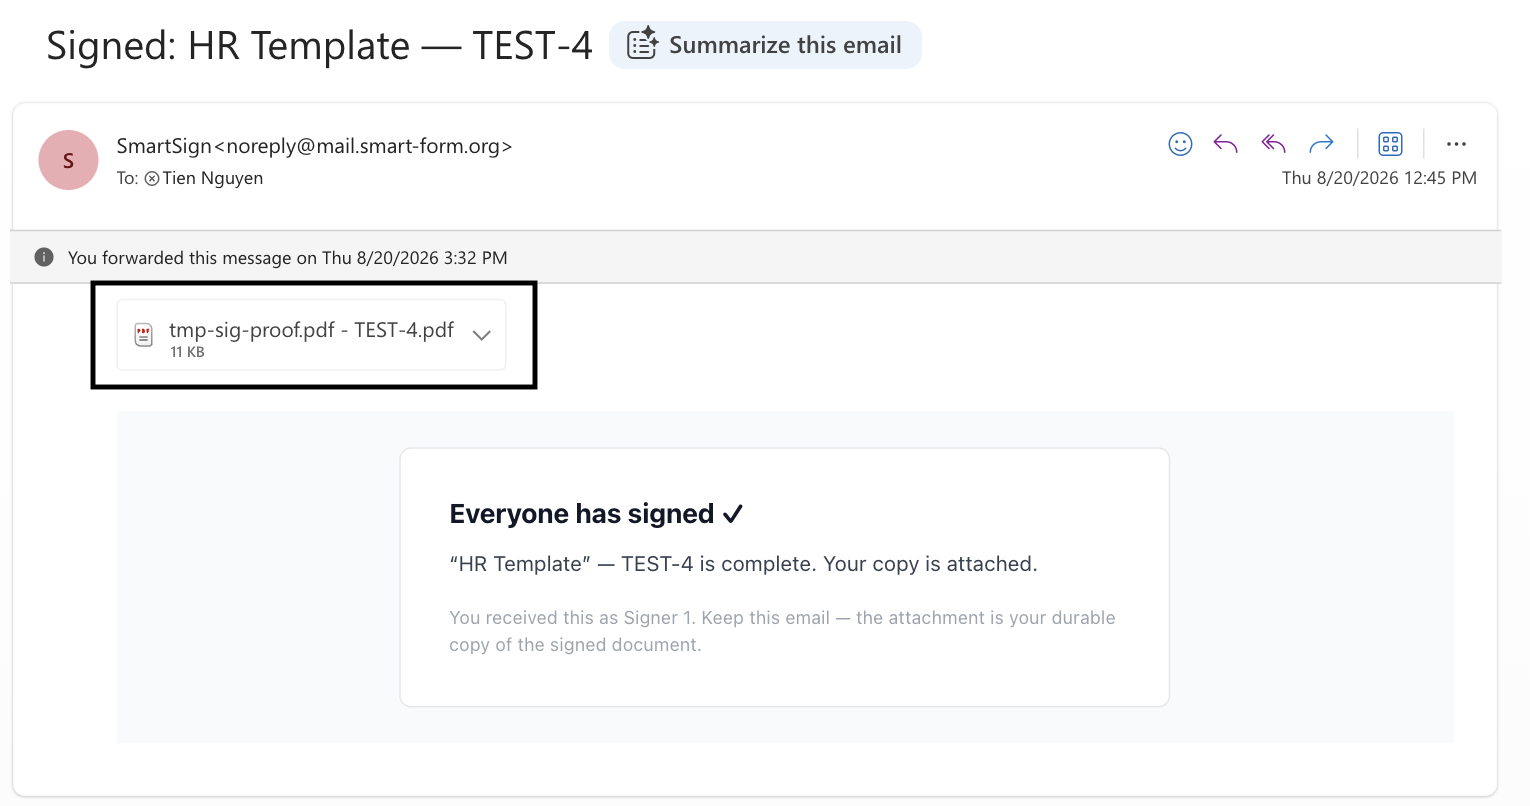
| Destination | Delivered |
|---|---|
| The File column | One signed PDF per document, named Document name - Item name.pdf |
| The Status column | Set to Completed, where configured |
| Mapped columns | Signer responses configured for write-back |
| Each signer’s inbox | A Signed: … email with the completed PDFs attached |
Multiple documents produce multiple files rather than a single merged PDF, so that each document remains separately identifiable on the board. A Certificate of Completion will be attached attached at the end of the signed documents.
Contact Support
Need assistance with SmartSign?
Need Assistance?
Our dedicated support team is ready to help you get the most out of SmartSign. Whether you have questions about setup, configuration, or advanced features, we’re here to assist.
Contact Support Team →