Action Form
Create actionable emails with clickable buttons that update your Monday.com board status columns — all without the recipient needing a Monday account.
Creating an Action Form
In the SmartForm board view, click the Add New Form button and select Action Form to create one alongside your existing Item, Subitem, and Survey forms.
Form Settings
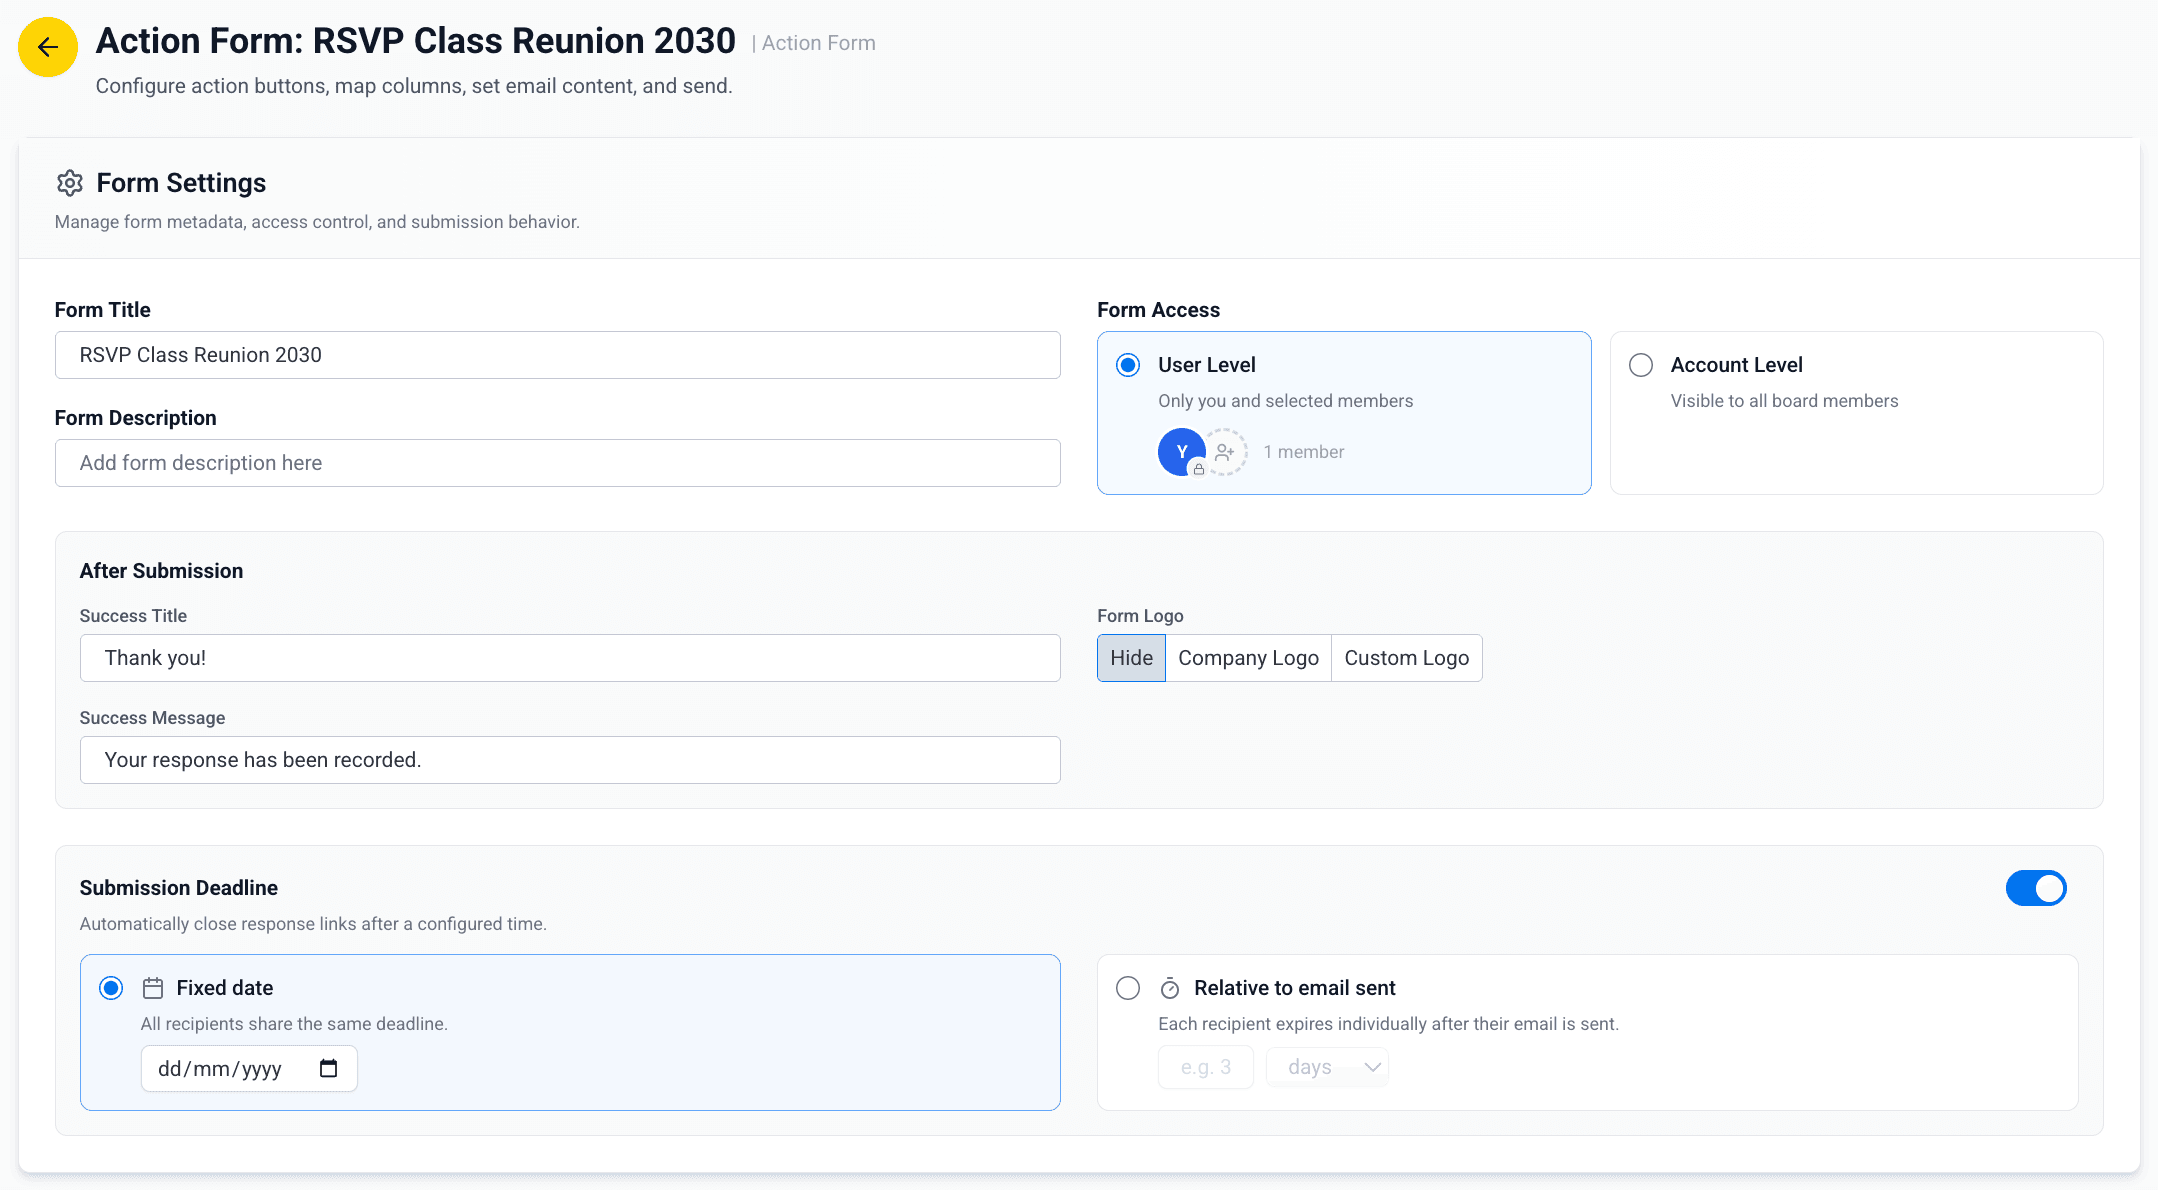
Configure your form’s metadata, access controls, and submission behavior.
Title & Description
| Field | Description |
|---|---|
| Form Title | Internal name to identify your action form (e.g., “RSVP Class Reunion 2030”) |
| Form Description | Optional internal notes for context |
Form Access Level
| Level | Description |
|---|---|
| User Level (default) | Only you and selected members can view and edit this form |
| Account Level | All board members can view and edit this form |
After Submission
| Field | Description |
|---|---|
| Success Title | Heading shown after the recipient clicks an action button (default: “Thank you!”) |
| Success Message | Message shown after submission (default: “Your response has been recorded.”) |
Form Logo
| Option | Description |
|---|---|
| Hide | No logo — minimal, distraction-free appearance |
| Company Logo | Uses your organization’s default Monday.com logo |
| Custom Logo | Upload a form-specific image (JPEG, PNG, GIF, WebP, SVG — max 5 MB) |
Submission Deadline
| Mode | Description |
|---|---|
| Fixed date | All recipients share the same deadline. Choose a specific calendar date. |
| Relative to email sent | Each recipient expires individually after their email is sent. Specify a duration in days or hours. |
Example: Set a fixed deadline of December 31 for an end-of-year RSVP, or set a relative deadline of 3 days so each recipient has 3 days from when they receive the email.
Once an email has been sent, changing the submission deadline on the form will not affect emails that were already delivered. The new deadline only applies to future emails.
Action Builder
The Action Builder lets you select a Status column from your board and configure clickable action buttons that will appear in the email sent to recipients.
Selecting a Status Column
Open the Status Column Dropdown
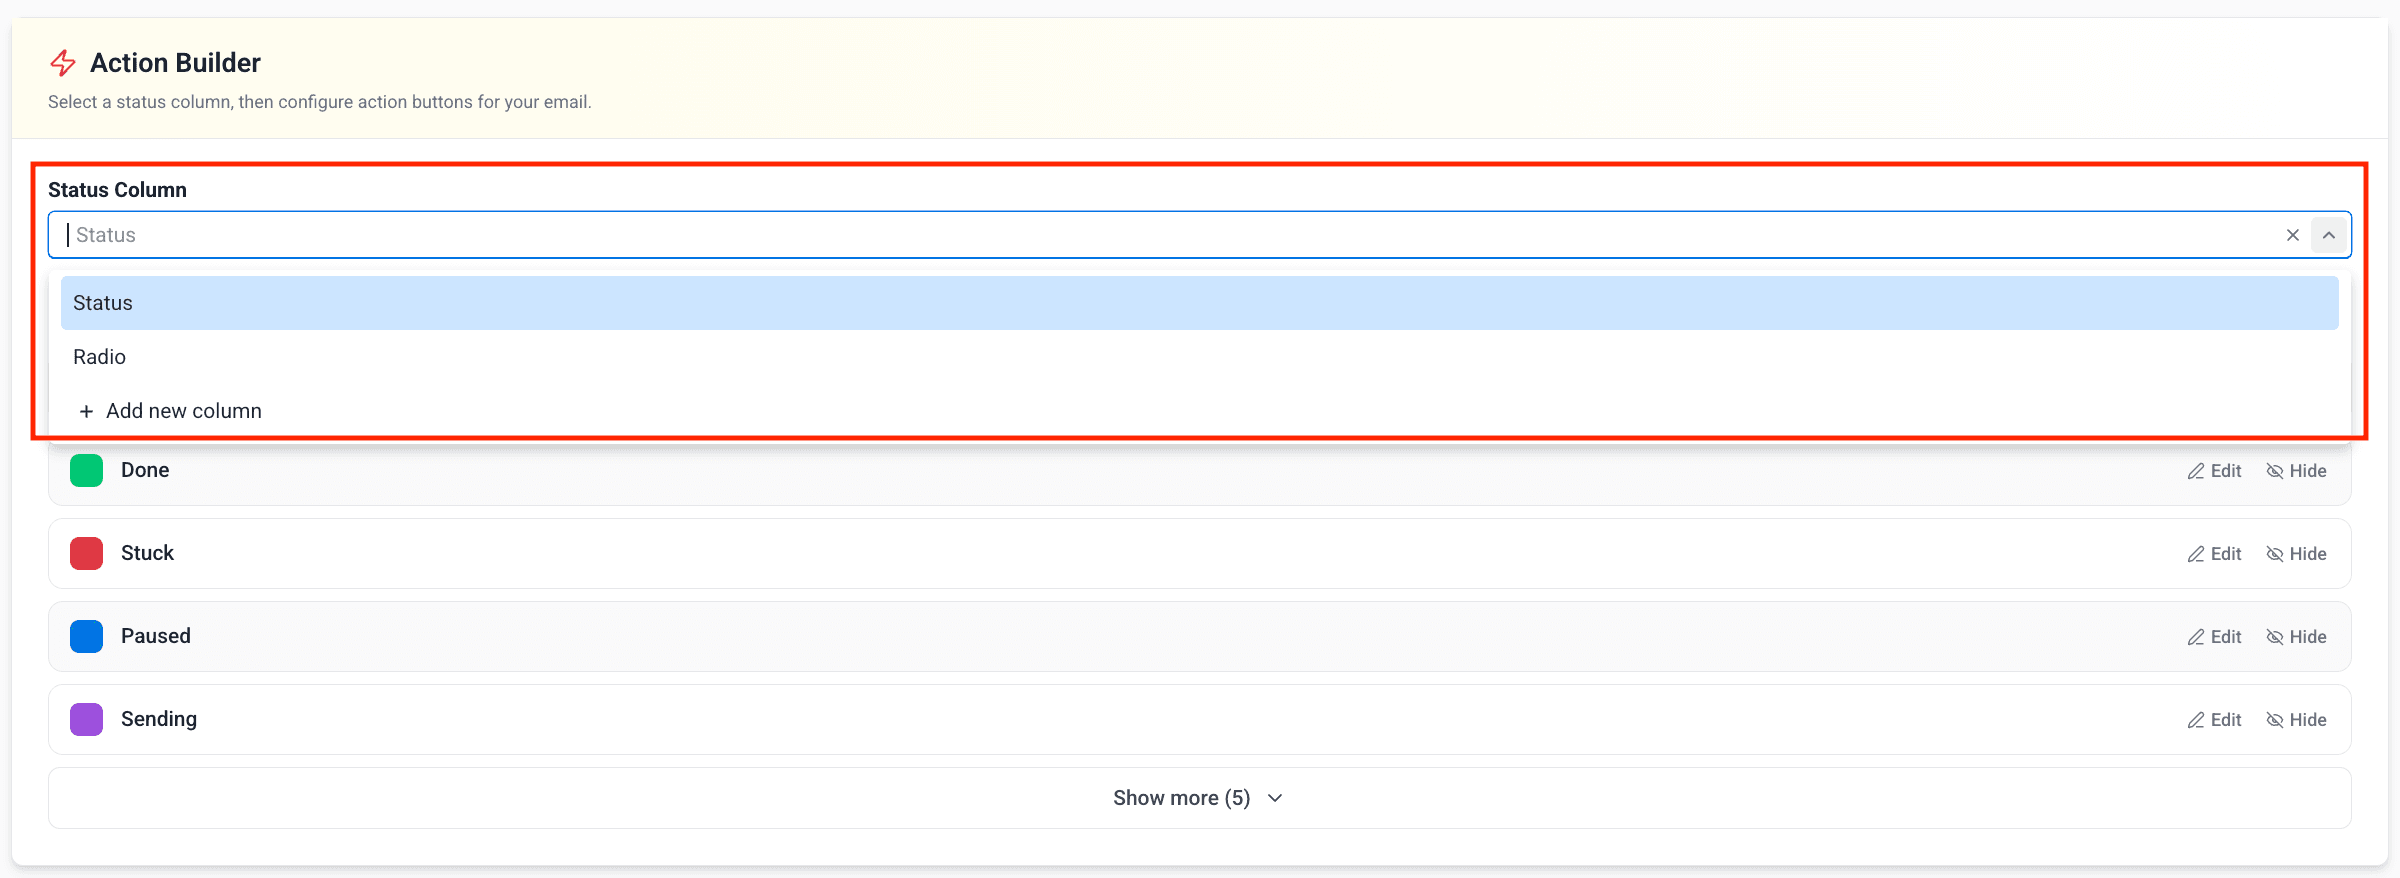
Click the dropdown under Status Column to view all available status and radio columns from your board.
Select a Column
Choose the column whose labels will become your action buttons. Existing status labels are automatically loaded as buttons.
Or Create a New Column
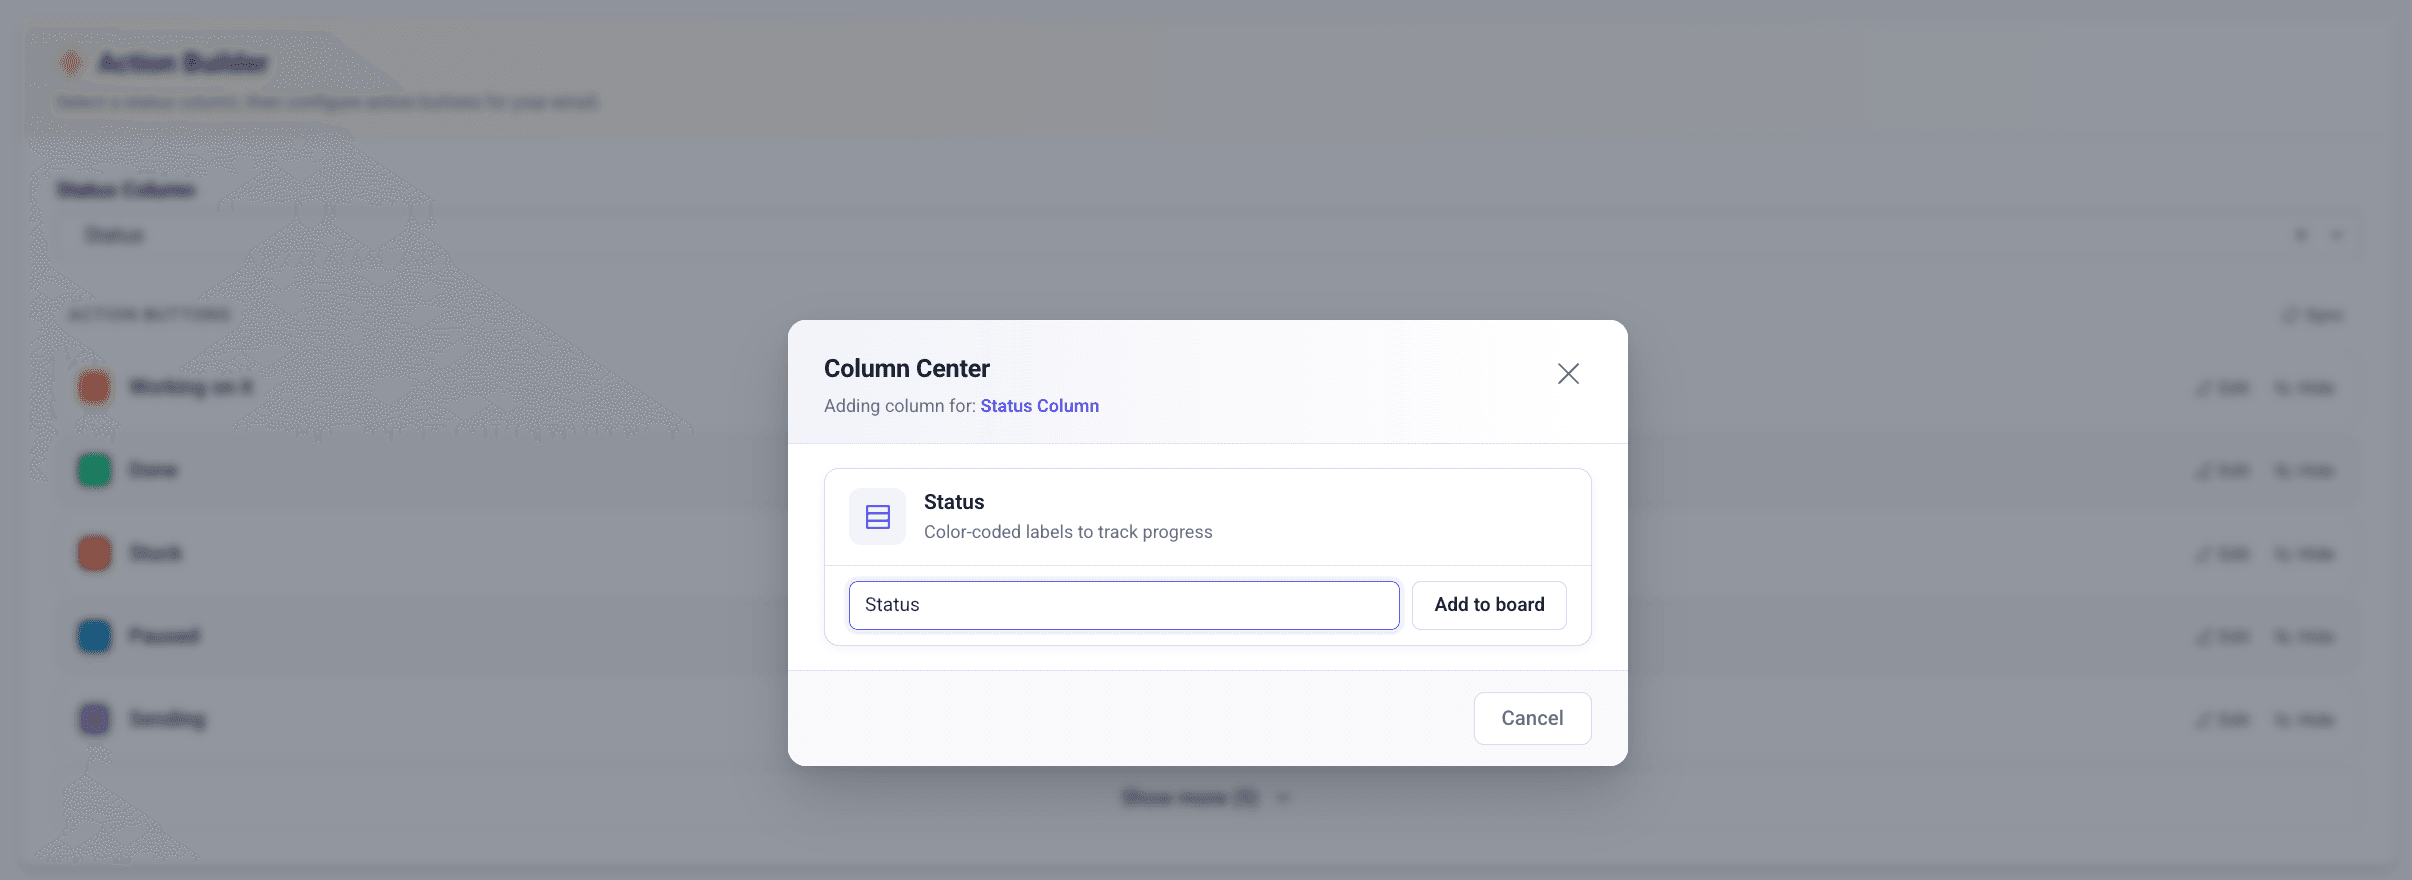
Each dropdown includes an “Add new column” option that opens a column creation modal, so you can create the right column type without leaving the editor.
Only Status and Radio column types are available for selection in the Action Builder.
Managing Action Buttons
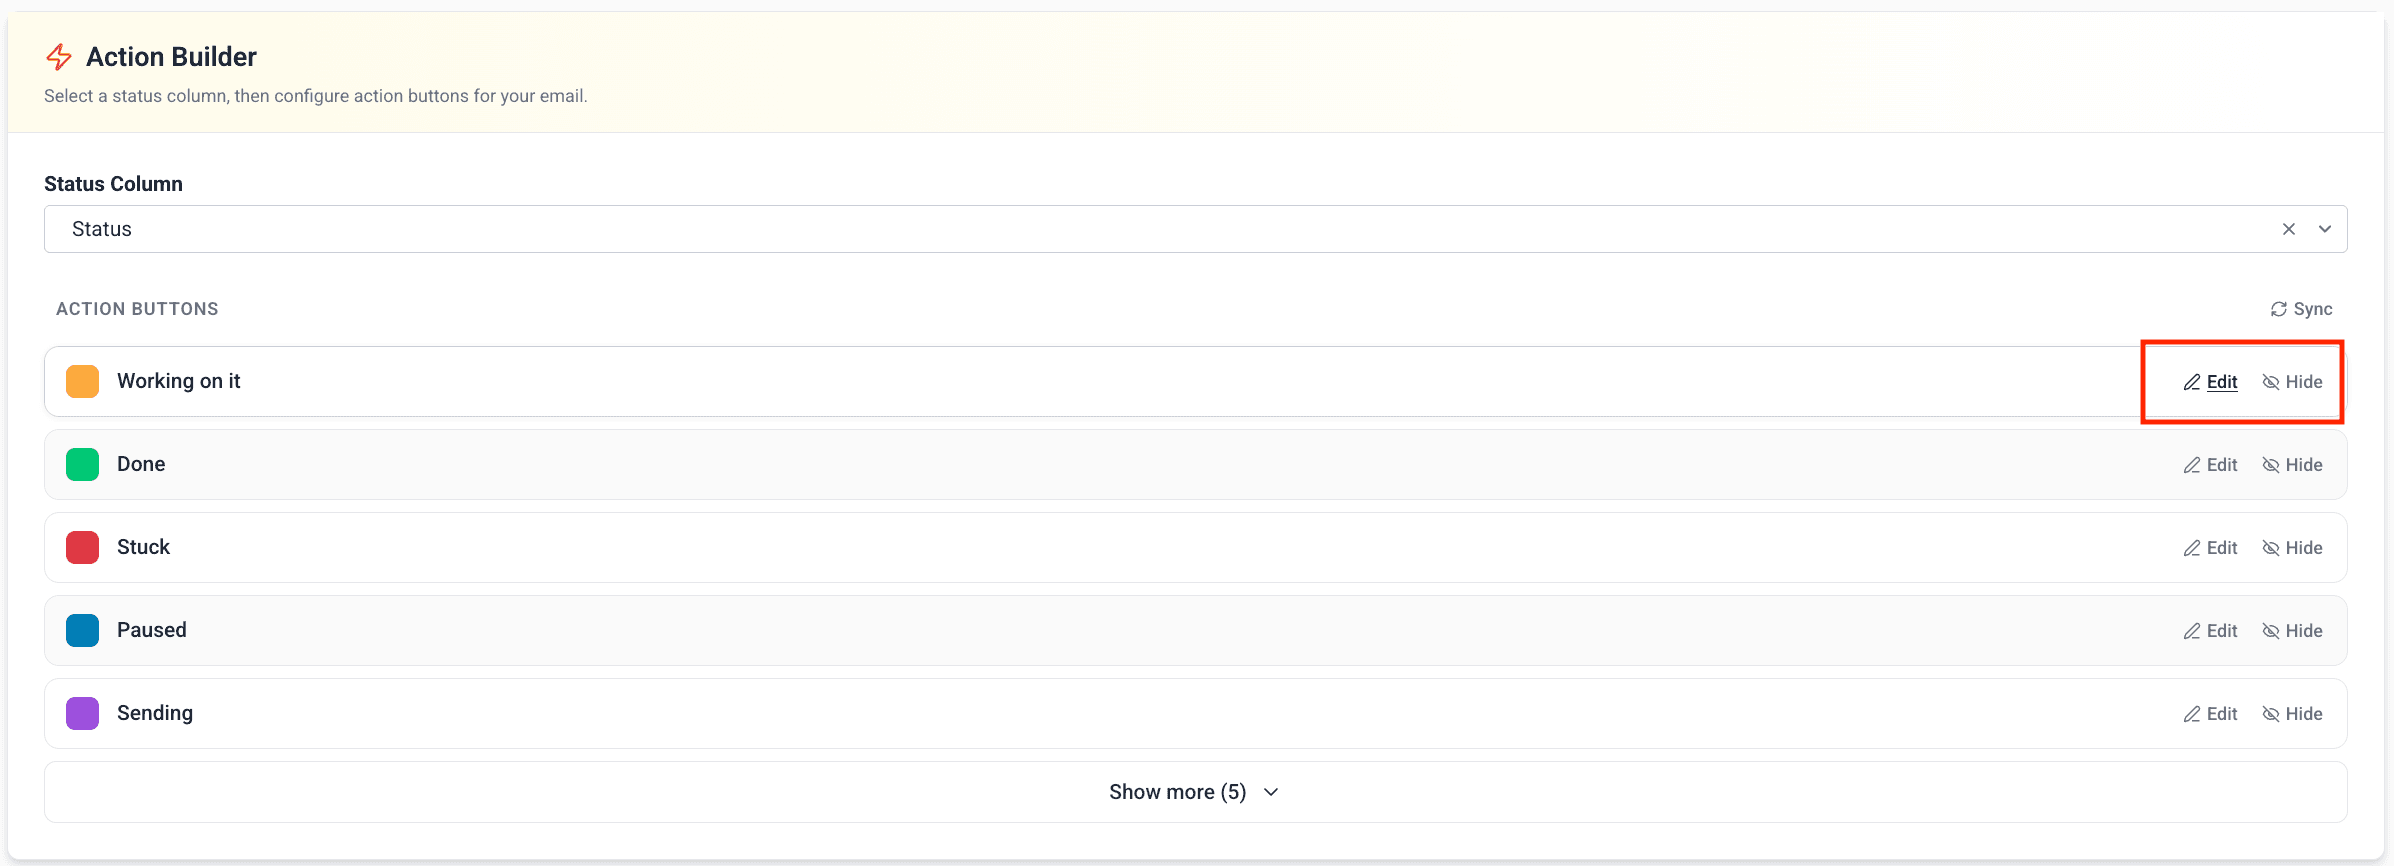
Once a status column is selected, all of its status labels are automatically loaded as action buttons.
| Action | How |
|---|---|
| Edit a button label | Click Edit on any button row — the label becomes an editable text field inline. Press Enter or click away to save, or press Escape to cancel. |
| Hide a button | Click Hide on an active button row to deactivate it — it will not appear in the email. |
| Show a button | Click Show on a hidden button row to reactivate it. |
| Sync buttons | Click the Sync button (top-right of the Action Buttons heading) to refresh the list from your Monday.com status column. |
Button labels and colors come directly from your Monday.com status column. Use Sync after making changes to the column in Monday to pull in the latest labels.
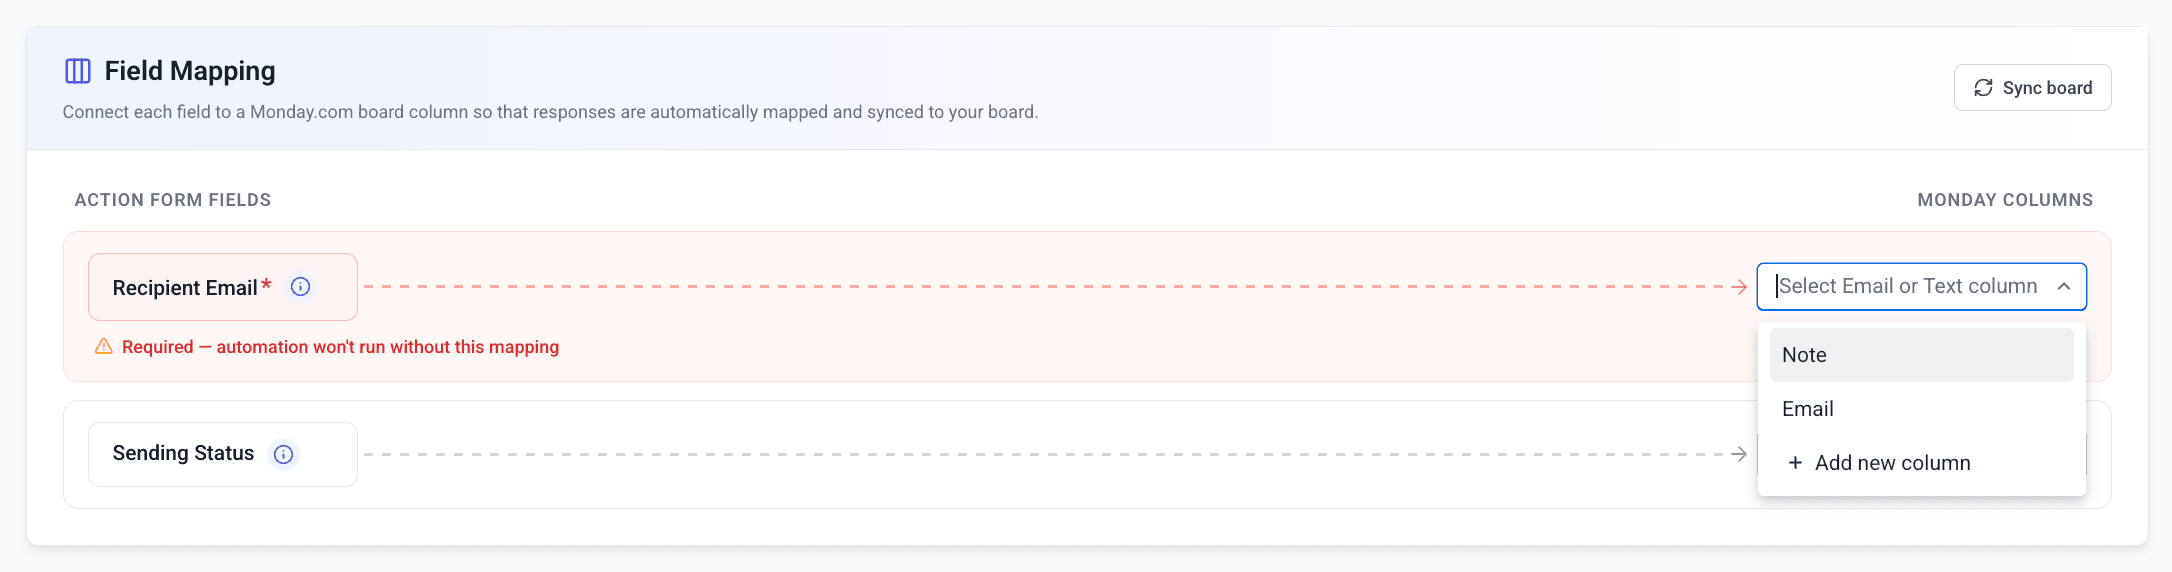
Field Mapping
Connect action form fields to columns on your Monday.com board. This determines where recipient data and sending status are stored.
Field Requirements
| Action Form Field | Required | Allowed Column Types | Purpose |
|---|---|---|---|
| Recipient Email | Yes | Email, Text | Stores recipient email addresses |
| Sending Status | No | Status | Tracks email sending state |
Recipient Email is a required mapping. The automation will not function without it.
Add New Column
Each dropdown includes an “Add new column” option that opens a column creation modal, so you can create the right column type without leaving the action form editor.
Sync Board
If you make changes to your board columns in Monday.com, click the Sync Board button to refresh the column list.
A green check (✅) means the field is mapped successfully. A red warning (⚠️) means a required field is still unmapped. Columns already in use are excluded from other dropdowns.
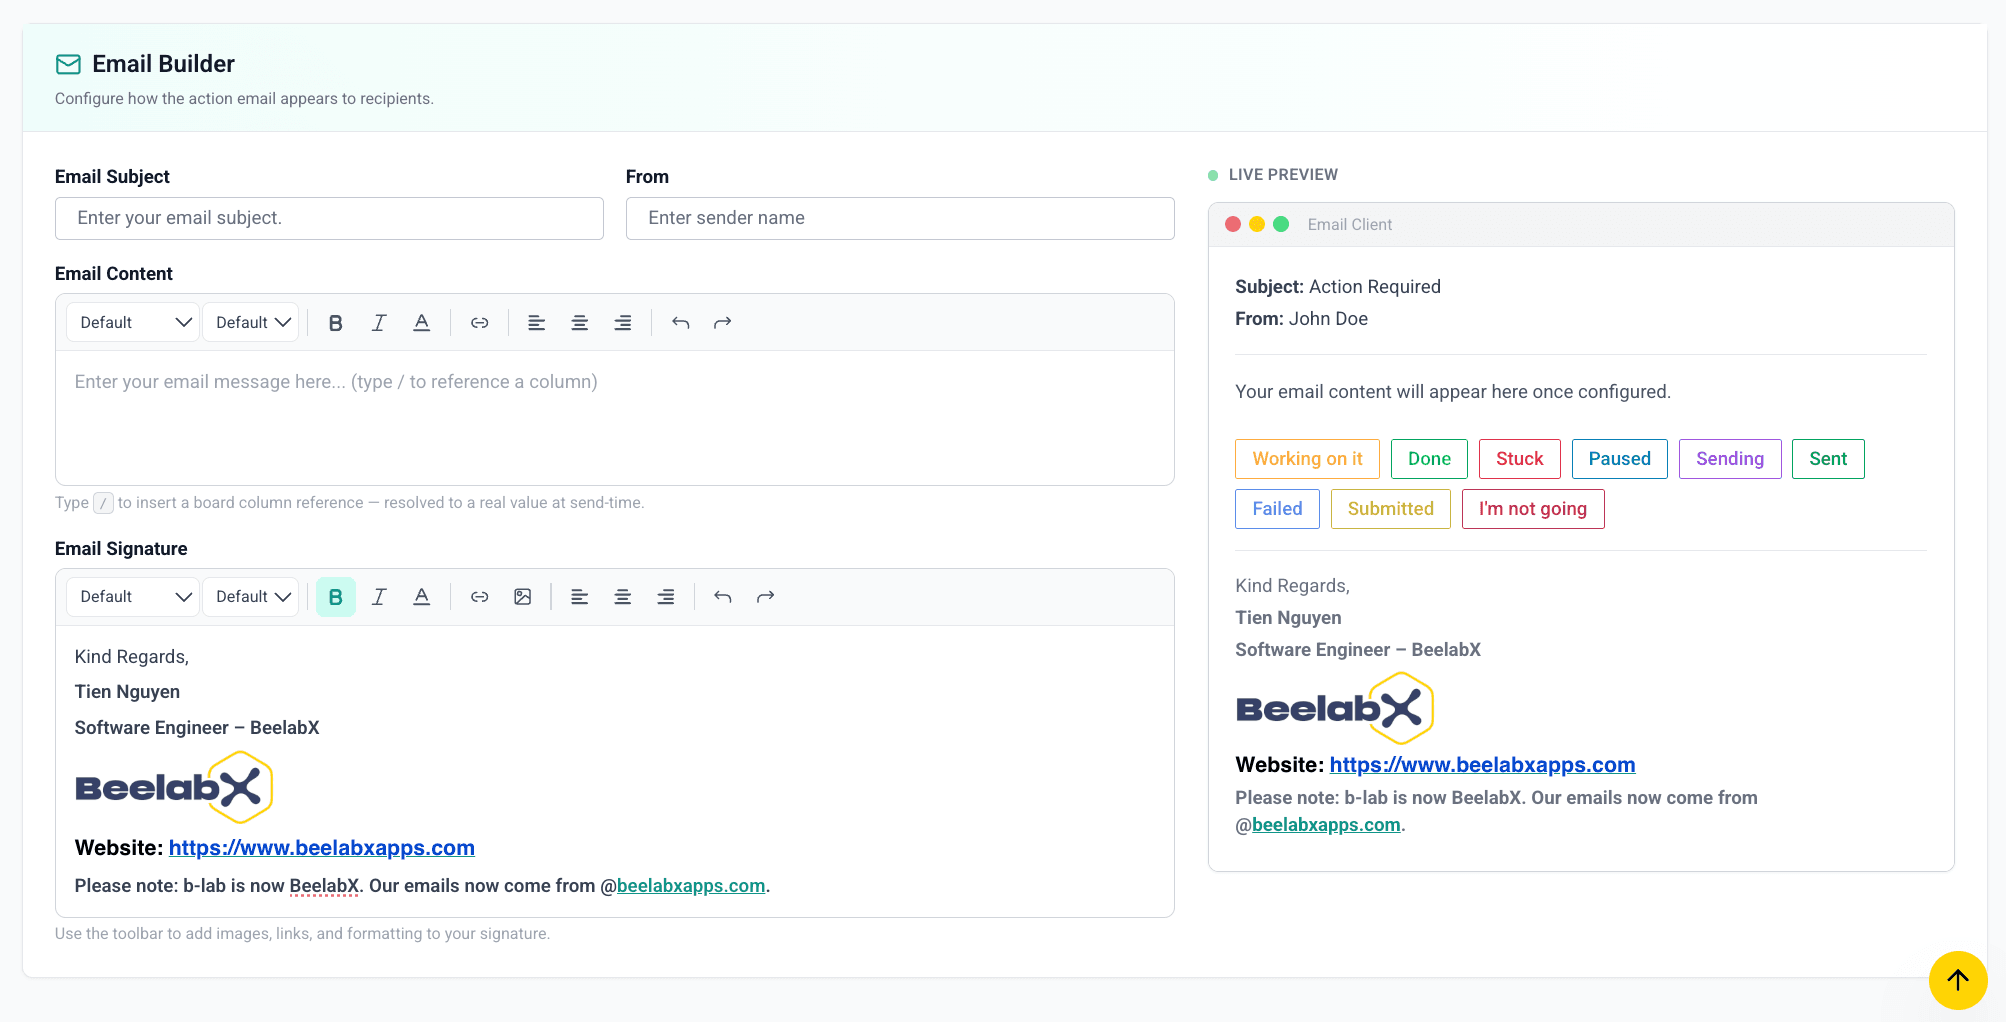
Email Builder
Design the action email your recipients will receive. The editor uses a split-pane layout — configuration on the left, live email preview on the right.
Email Configuration
| Field | Description |
|---|---|
| Email Subject | Subject line shown in the recipient’s inbox |
| From (Sender Name) | Display name of the sender |
| Email Content | Body text of the email — supports dynamic column references |
| Email Signature | Appended at the bottom — supports column references and inline images |
Dynamic Column References
Personalize your emails by inserting values from your Monday.com board columns.
Type the / key
While editing the Email Content or Signature fields, press / to open the column reference menu.
Select a column
Choose from the list of available board columns (e.g., “Client Name”, “Company”).
Token is inserted
A column token (e.g., {client_name}) is inserted into the text. At send time, it is replaced with the actual item value.
Supported Column Types
Only columns matching the types below will appear in the / reference menu. Other column types are not supported for dynamic references.
| Column Type | Monday API Name |
|---|---|
| Text | text |
email | |
| Long Text | long-text / long_text |
| Numbers | numeric / numbers |
| Status | status / color |
| Link | link |
| Date | date |
| Phone | phone |
| Location | location |
| Rating | rating |
| Item Name | name |
Some types have multiple aliases (e.g., long-text / long_text, numeric / numbers, status / color) to handle inconsistencies in the Monday API naming.
Not supported: Timeline, People, Dropdown, Checkbox, File, Hour, Week, World Clock, Tags, Country, Mirror, Formula, Dependency, Board Relation, and Subitems columns cannot be used as dynamic references.
Email Signature with Images
The signature editor supports rich formatting including inline images. Click the image icon in the toolbar to upload a logo or branding asset to your signature.
Sending Action Emails
Action emails are sent using Monday.com automations. This connects your action form configuration to actual email delivery.
Setting Up the Automation
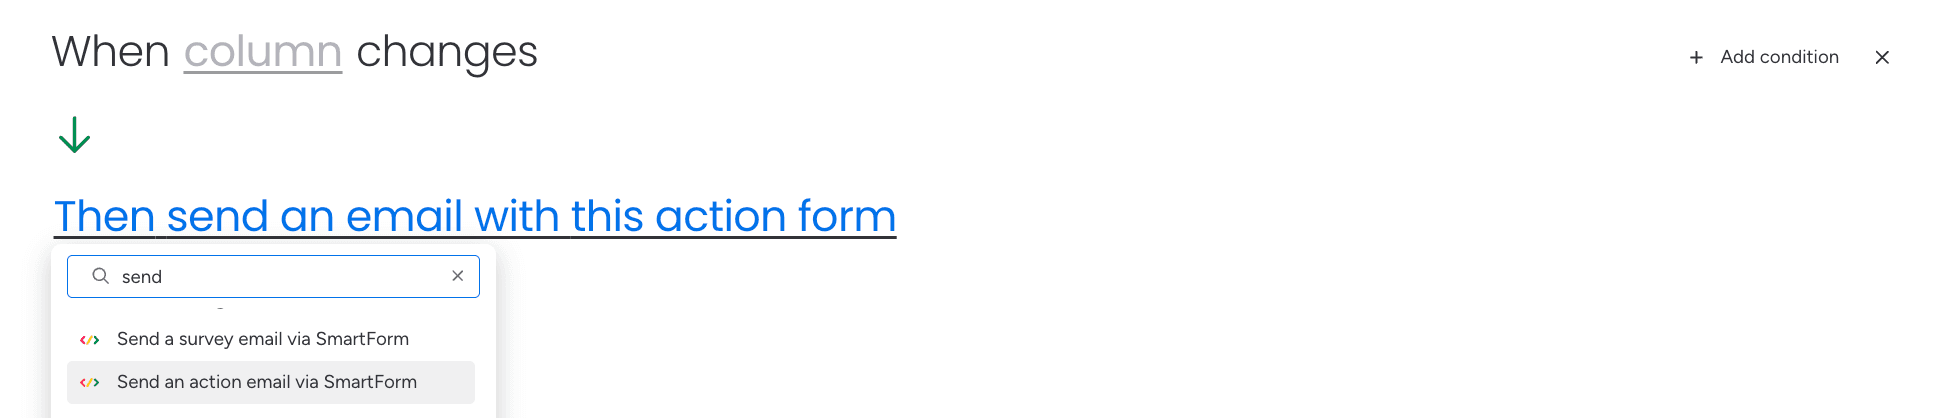
Go to Integrations
Open your board’s Integrations section in Monday.com.
Configure the trigger and action
- When: a specific status column changes to a specific value
- Then: send an action email via SmartForm for the selected action form
Save the automation
Your automation is now active and will send action emails whenever the trigger condition is met.
What Happens When Triggered
When the automation fires, the system:
- Reads the recipient email from the mapped column
- Generates a unique action link tied to the specific board item
- Sends the email with the configured action buttons embedded
- Updates the Sending Status column (if mapped)
Each board item generates a unique action link tied to that specific recipient and item. This ensures responses are tracked per-item on your board.
Action Submission
This section covers the recipient experience — from receiving the email to clicking an action button.
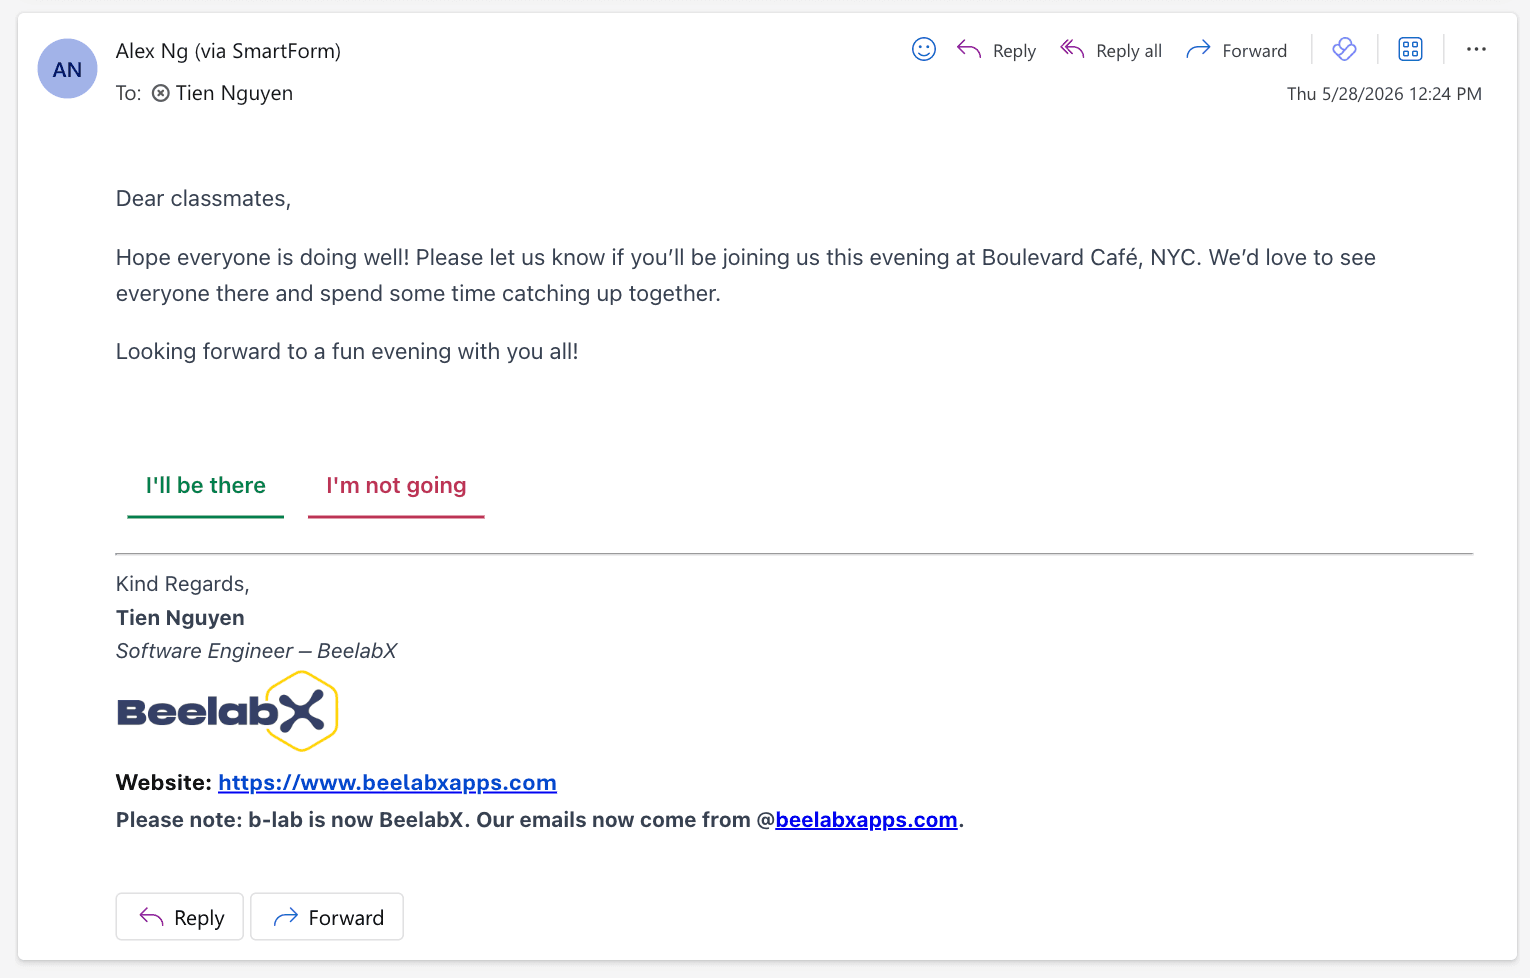
What Happens When a Button is Clicked
- Recipient opens the email and clicks one of the action buttons
- They are taken to a confirmation page showing the selected action
- The corresponding status value is updated on the Monday.com board item
- The recipient sees the configured success title and message
Error States
The action form handles edge cases with clear error messages:
| Error | Cause |
|---|---|
| Form Not Found | Action form was deleted by an admin |
| Inactive Form | Action form was disabled by an admin |
| Inactive Link | The submission deadline has passed |
| Subscription Expired | App subscription needs renewal |
Contact Support
Need help with Action Forms or other SmartForm features?
Need Assistance?
Our dedicated support team is ready to help you get the most out of SmartForm. Whether you have questions about setup, configuration, or advanced features, we’re here to assist.
Contact Support Team →