SmartForm User Guide
Create powerful, customizable forms for Monday.com with advanced permissions and unique shareable links
Installation
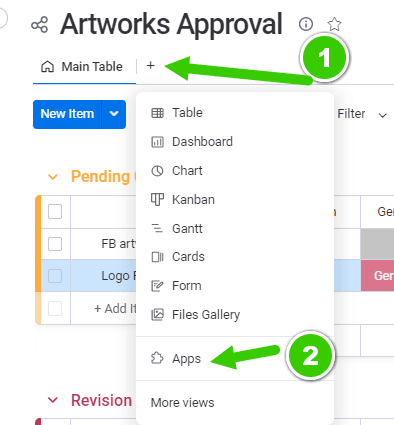
Find SmartForm in Board Views
Look for the “SmartForm” app using the Board views section in your Monday.com board.
Access Your Settings View
Once the app is installed, it will automatically create a Board view called “SmartForm”, which serves as your central configuration hub.
Notes: The SmartForm view will be used for all app settings and form management (see section 4 for details)
Setting Up a Form
Creating a Form
In the SmartForm board view, you’ll find options to create two types of forms:
Main Item Forms
Creating a Main Item Form
Open the Form Menu
In the SmartForm view, locate the dropdown menuSelect ”+ Form”
This will create a form using your board’s main item columns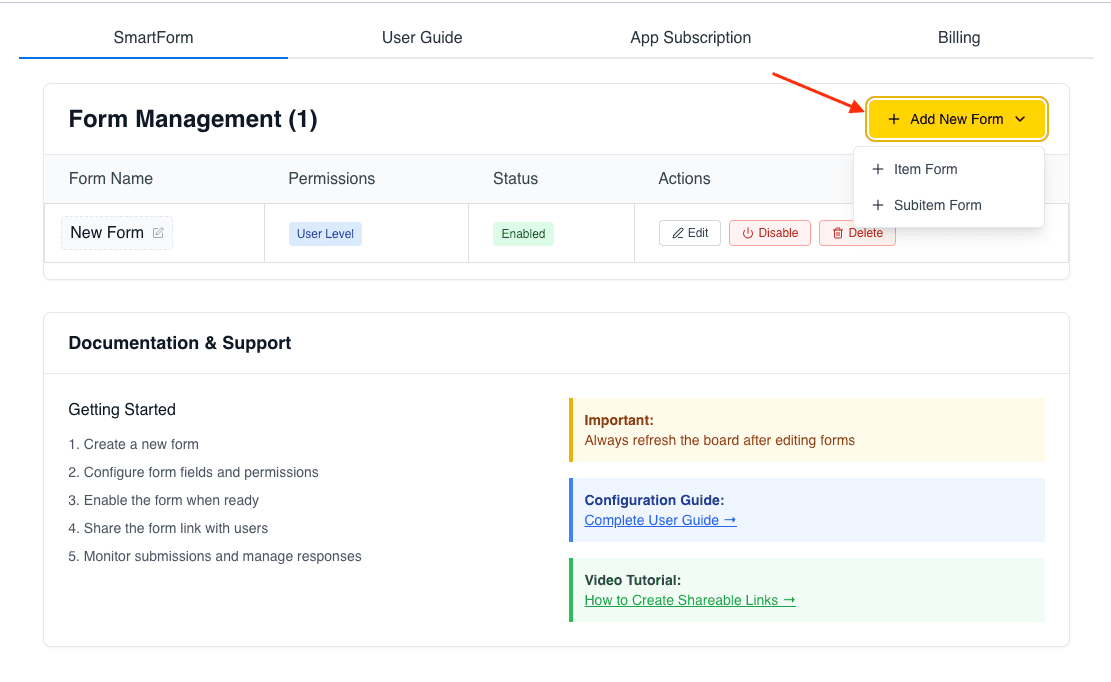
Start Configuring
Your new form is ready to be customized!Perfect for: - Customer intake forms - Project requests - Application submissions - Survey responses
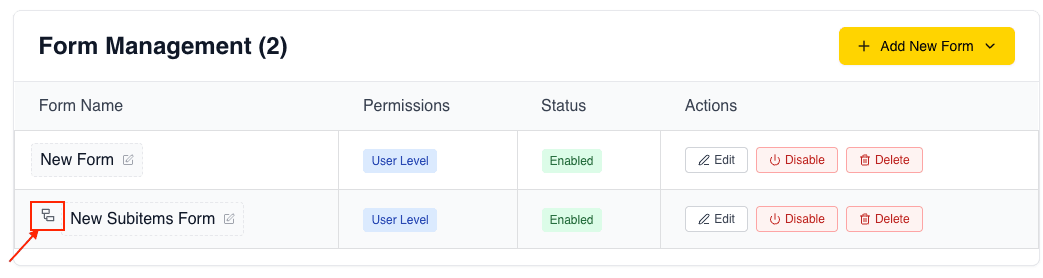
Tip: You can easily differentiate between Item Forms and Subitem Forms by looking for the subitem symbol (⊟) in front of the form name.
Configure Your Form Fields
Before generating your shareable link, it’s recommended to configure your form’s fields and interface settings.
Step 1: Navigate to SmartForm View
Go to the SmartForm Board view that was created during installation
Step 2: Open Form Settings
Click on “Edit Form” for the form you want to configure
Notes: Both main item forms and subitem forms share the same configuration options
Column Display & Configuration
Configure which columns appear in your form and how users interact with them.
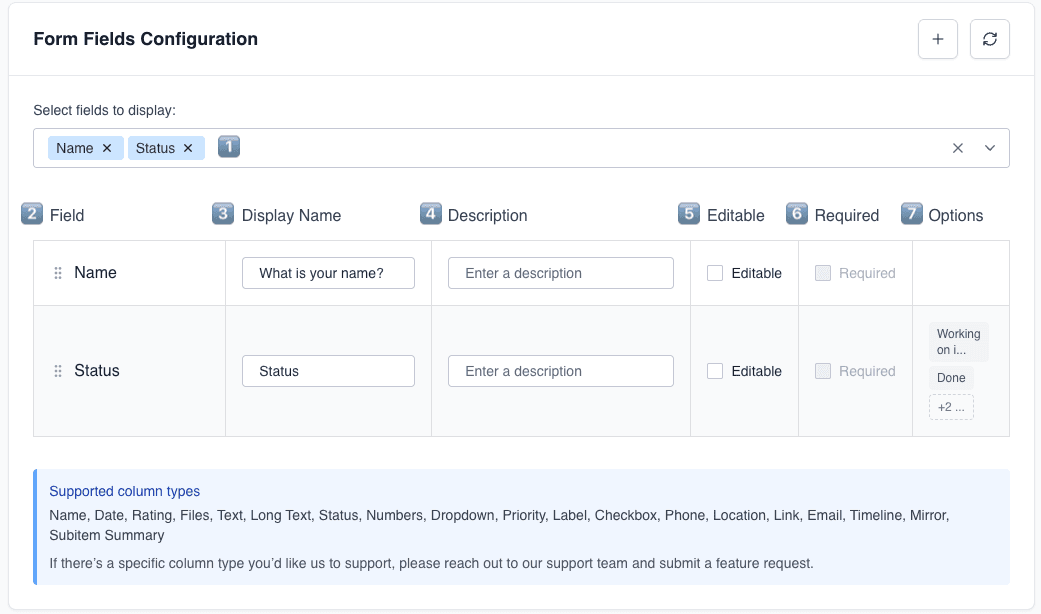
Select Your Columns
Click the dropdown menu to view all available fields from your board
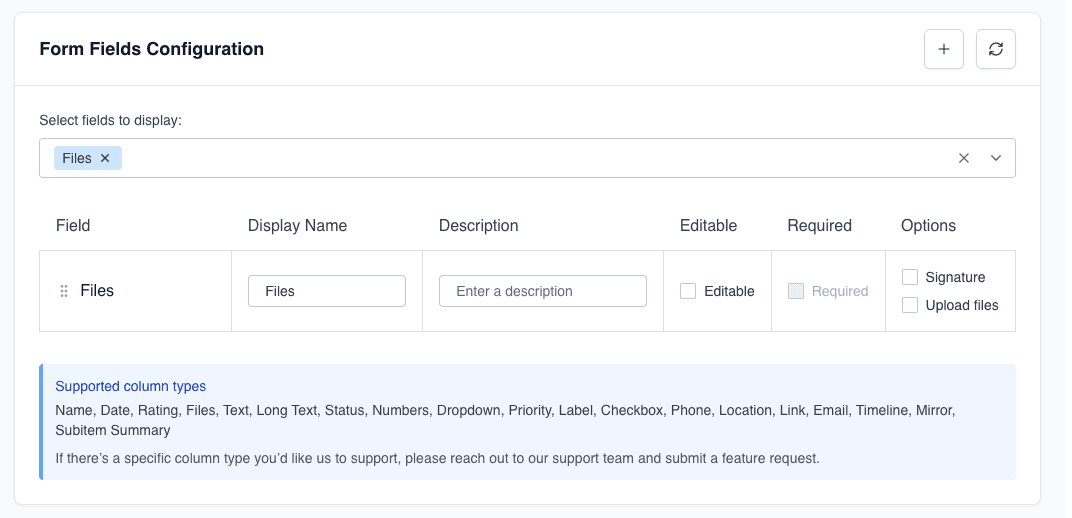
Configure Each Field
For each selected column, you can customize:
Field — The internal Monday.com column name
Display Name — The label or question shown to users
Description — Additional context or instructions for each field
Editable ☑️ — Allow users to modify this field
Required ☑️ — Force users to complete this field
Options — Shows available choices for status/dropdown columns
Organize Your Fields
Selected fields appear as tags (e.g., Name, Status) and can be reordered
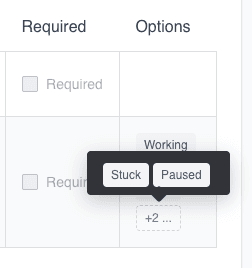
Tip: Hover over the +2... indicator to view hidden or un-displayed
status labels without expanding the full list.
Reordering Form Fields
You can easily rearrange your form fields using drag-and-drop:
Tip: Hover over the column header until the drag cursor (⋮⋮) appears, then drag to your preferred position
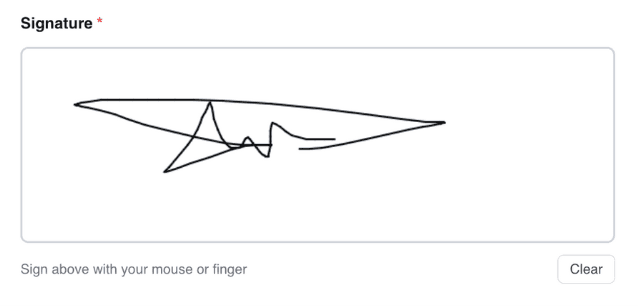
File Columns
File columns offer powerful and flexible options for document management and signature collection.
Display Files
Display Files & Images to Users
When the Signature option is unchecked, any files in the column will be displayed to users in the submission interface.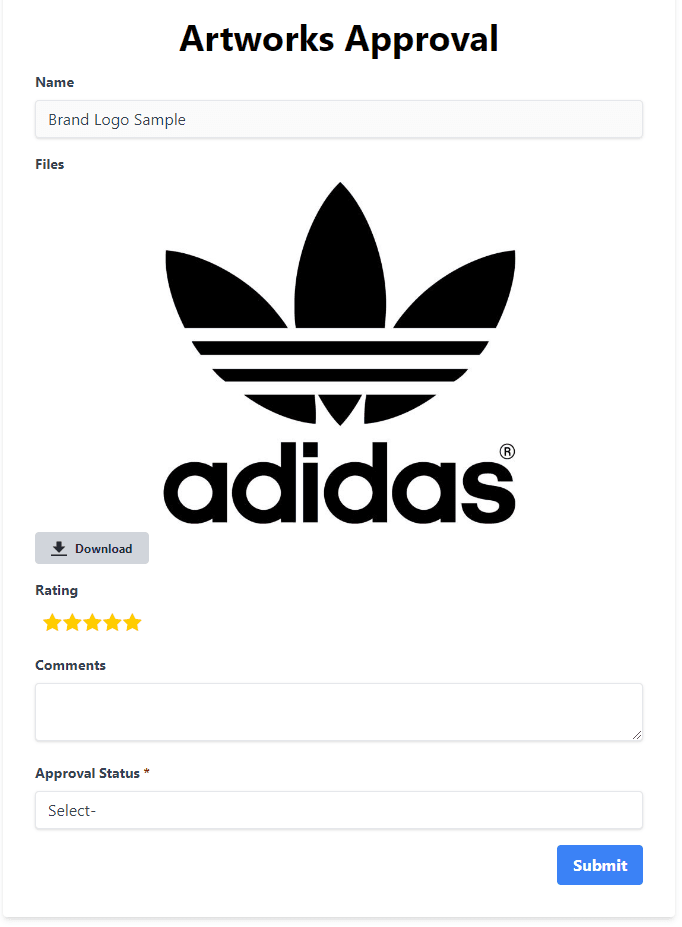
Supported Features:
View PDFs directly in the interface
JPG, PNG, GIF, WebP, SVG
For other file types
Display multiple files sequentially
Note: Image format support depends on the user’s browser, but all common formats are compatible.
Use cases:
- Share contracts for review
- Provide reference documents
- Display product specifications
- Show instructional materials

Mirror Column
Display information from connected boards directly in your form.
What is a Mirror Column?
A mirror column allows you to display data from another board that’s connected to your current board. This creates a live preview of related information without duplicating data.
How it works in SmartForm:
Set up a Mirror Column in Monday.com
First, ensure you have a mirror column configured in your Monday.com board that pulls data from another connected board
Add Mirror Column to Your Form
In the form editor, select your mirror column from the available fields dropdown
Users See Live Data
When users view or fill out the form, they’ll see the current content from the connected board displayed in real-time
Use cases:
- Show client details from a CRM board when creating project requests
- Display product specifications from an inventory board in order forms
- Preview employee information from an HR board in assignment forms
- Show related project data when creating task submissions
Note: Mirror columns in forms are typically read-only, displaying information for reference without allowing direct edits.
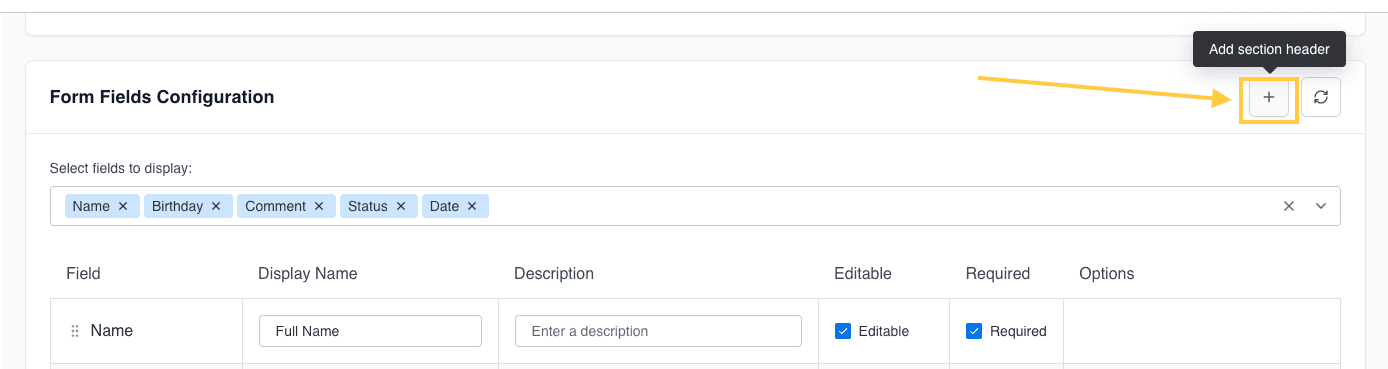
Creating Sections
Group related fields into logical sections for better form organization and user experience.
Add a New Section
Click the ”+” button in the form editor
Configure Section Details
Add a descriptive title and optional explanation text

Organize Your Sections
Drag and drop sections to reorder them between fields
Tip: You can create multiple sections and easily rearrange them by dragging and dropping. This helps break long forms into digestible, organized chunks.
Example section structure:
- Name
- Phone
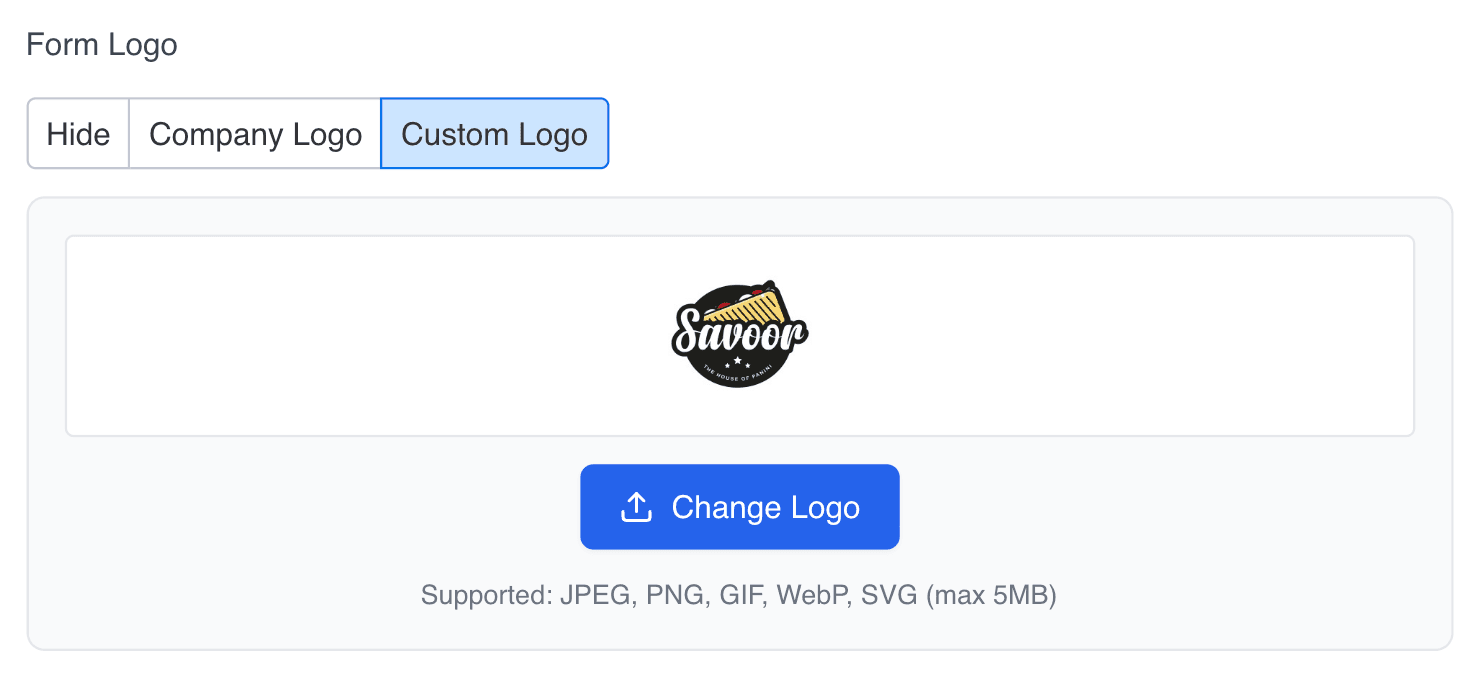
Form Logo
After configuring your fields, customize the visual appearance and behavior of your form.
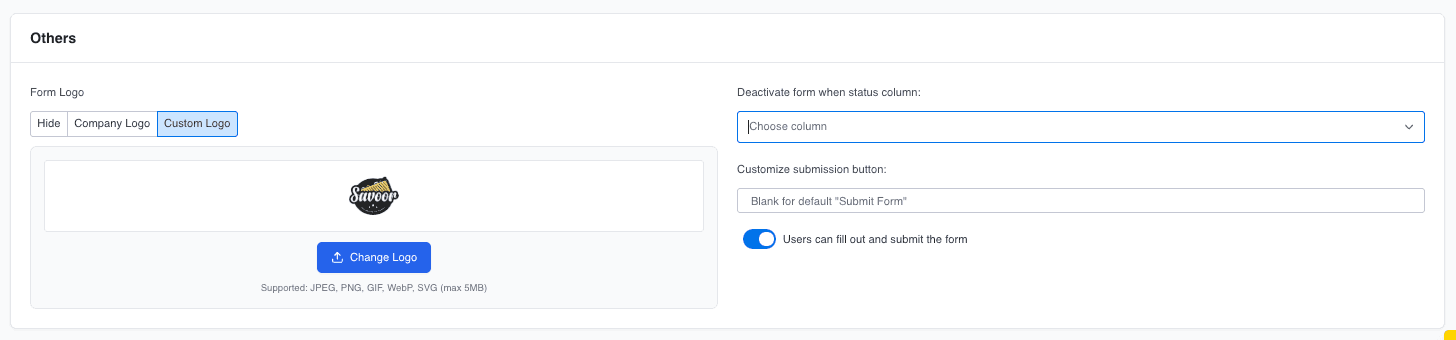
Form Logo Configuration
Choose how to brand your form with three logo options:
Hide Logo
No Logo Display
Select this option for a minimal, distraction-free form appearance.Best for: - Internal forms - Quick surveys - Minimalist design preference
Form Behavior Settings
Control how your form functions and when it becomes available or disabled.
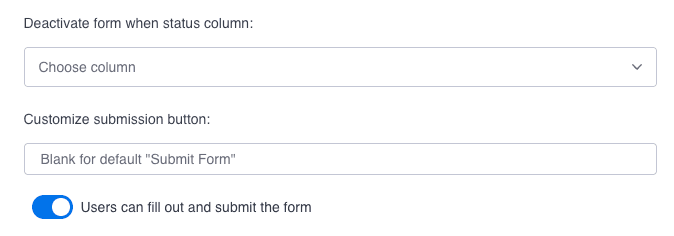
🔒 Deactivate Form When Status Column
Automatically disable form submissions based on a specific column’s status value.
Use cases:
- Close applications after a deadline
- Pause intake when capacity is reached
- Stop submissions during processing periods
✏️ Customize Submission Button
Change the button text from the default “Submit Form” to match your specific use case.
| Form Type | Button Text |
|---|---|
| Job Applications | ”Apply Now” |
| Event Registration | ”Register” or “Sign Up” |
| Support Tickets | ”Send Request” |
| Surveys | ”Submit Responses” |
| Orders | ”Place Order” |
🎯 Form Fill and Submit Toggle
Control whether users can submit new entries or only view the form.
Actions After Submission
Configure automatic actions that occur when a form is submitted.

Select a Status Column
Choose which column to update upon form submission
Choose the New Status
Select what status value to apply automatically
Save Your Settings
Changes are applied immediately
Example workflow:
- Status → 'New Submission'
- Triggers Monday automation
- → Notify team members
- → Assign to review queue
Tip: Combine this with Monday.com automations for powerful workflows like auto-assigning owners, sending notifications, or creating subitems.
How to Share Your Form
Transform your form into a shareable link that anyone can access.
Setting Up the Integration
Step 1: Create a Status Column
Ensure your board has a Status column dedicated to triggering link generation
Step 2: Navigate to Integrations
Go to your board’s Integrations section
Step 3: Add the Automation Recipe
Select the appropriate SmartForm automation recipe
Step 4: Configure the Trigger
Set which status change will generate the unique link
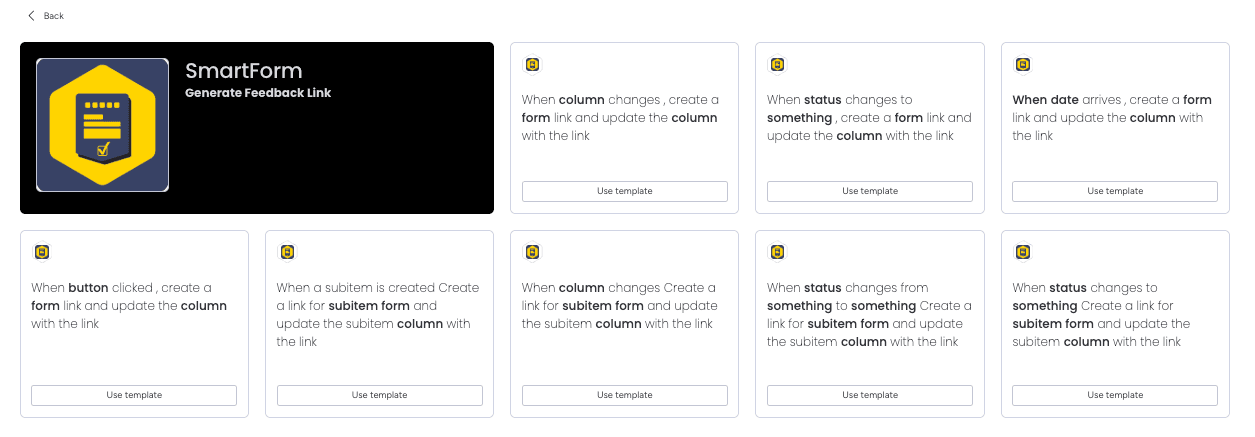
Main Forms vs. Subitem Forms
SmartForm provides 8 automation recipes in total — make sure you choose the right one!
Main Item Forms
4 automation recipes available
Identifier: Recipes reference
“Form”
Subitem Forms
4 automation recipes available
Identifier: Recipes reference
“Subitem Form”
Reminder: Make sure to select the correct automation recipe type based on whether you’re generating a link for an item or a subitem.
Need Help Choosing?
View All Automation Recipes
Detailed list with examples and configuration guides for each recipe type
View Automation Recipes →
How to Create Multiple Forms
One of SmartForm’s most powerful features: unlimited forms per board, each with unique configurations.
Navigate to SmartForm View
Open your SmartForm board view
Create Additional Forms
Click ”+ New Form” or ”+ New Subitem Form”
Configure Independently
Each form has its own:
- Field selection and order
- Display settings
- Logo configuration
- Permission levels
- Link column (can reuse or create new)
Add Automation Recipes
Don’t forget to add a separate recipe in the Integrations section for each new form!
Reminder: Each new form requires its own automation recipe in the Integration section of your board.
Why use multiple forms?
Separate forms for customers, vendors, and internal staff
Different forms for intake, approval, and completion
Language-specific forms for international users
Form Permissions
Understanding and managing permissions is crucial for security and collaboration.

User Level
User Level Permissions (Default)
When you create a form, it automatically starts with User Level permissions.Access & Capabilities:
Exclusive access granted to you
Full configuration access
Configure automation recipes
No visibility for other users
Best for: - Personal forms and testing - Sensitive configurations - Development and experimentation - Forms with restricted visibility needs
Changing Permission Levels
Open Form Settings
Click on the form you want to modify
Locate Permission Toggle
Find the radio button selector at the very top of the form
Select New Permission Level
Choose between User or Account level
Automatic Save
Your changes are saved instantly — no manual save required
Critical Warning: Before deleting or deactivating a user who created forms with User Level permissions, you must switch to Account Level permissions first. Otherwise, the form will become permanently inaccessible with no recovery option.
Permission Change Checklist:
Appendix
Supported Column Types
SmartForm supports in total 19 different column types, giving you maximum flexibility in form design.
📝 Name
📅 Date
⭐ Rating
📎 Files
📄 Text
📑 Long Text
🔘 Status
🔢 Numbers
📋 Dropdown
⚡ Priority
🏷️ Label
☑️ Checkbox
📱 Phone
📍 Location
🔗 Link
📊 Timeline
🪞 Mirror
📈 Subitem Summary
Support & Resources
Need additional help or want to learn more about SmartForm?
Need Assistance?
Our dedicated support team is ready to help you get the most out of SmartForm. Whether you have questions about setup, configuration, or advanced features, we’re here to assist.
Contact Support Team →